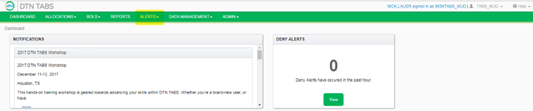
About Alerts
Alerts manage the DTN TABS system by sending information through email or SMS about system behaviors.
Terminal communication, customer loading issues or even information about product and credit allocations can be monitored.
Internal personnel and customers can be set up to receive Alerts to better manage loading patterns and contractual obligations.
Individual contacts can be set up and used to create custom Receiver Lists. Each contact can be assigned to multiple groups so terminal or region specific Receiver Lists can send out Deny or other system alerts.
Once an alert has been set up, DTN TABS checks processing every 5 minutes to determine whether a transaction has occurred that should trigger an alert. If so, the system automatically sends the alert to the associated contact or alerts receiver list.
A custom Sender email address can be set up so the alert appears to have come from your organization rather than DTN. DTN recommends you use this feature when sending Alerts to customers to eliminate confusion and enables them to reply to the Alert and get assistance from your Customer Service group or other area. Multiple Sender addresses can be set up so Credit Alerts appear to have been sent from the Credit Department and Product Alerts appear to have been sent from the Supply Department.

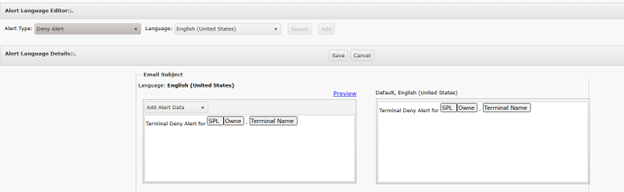
The Language Editor allows for customized verbiage for Alerts. Select the type of alert to work with and the language. Clicking Add will display templates that can be configured to display the information you would like to use. Options are:
- Email Subject
- Email Text
- Default
- SMS Subject.
- SMS Text
Use the drop down menu for each option to select the data to display. Click Preview to see how the message will appear.
Another available feature is a Custom Footer Message that appears on all Credit and Product Allocation Alerts. Customers can be sent to the Allocation Viewer for more information or to any desired site or group for more information.
Setting Up an Alert Notification
The basic process for setting up an alert notification is:
- Set up Alerts Receivers
- Set up Alerts Senders
- Select an alert type and set it up.
- Associate senders and receivers to the alert.

Note: For more information on enabling Allocation Viewer Alert Management and setting manageable alerts, see DTN TABS Initial Setup – Admin Training Manual.
Setting Up Alerts Contacts
Alerts Contacts make it possible to enter email or text message delivery addresses for individuals who should receive alert notifications.
Creating a New Contact
Here’s how to create a new contact:
- Click Add then Contacts. A pop up page
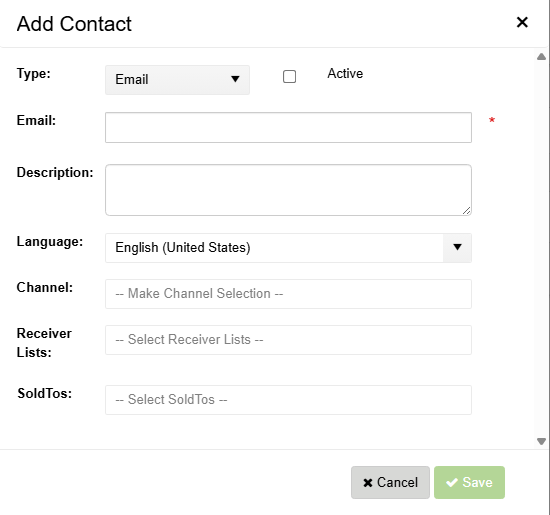
- Enter the following information
- Type: Options are SMS Email or Email
- Select Active
- Enter the recipient’s email address
- Enter a description, if desired
- Select the recipient’s language
- Select a channel, if applicable
- Select a receiver list, if applicable
- Select SoldTos, if applicable
- Save.
- The recipient is added as a contact.
Note: With the appropriate permissions, you can edit or delete a list by selecting the Edit or Delete links next to each list in the Contacts panel.
Note: SoldTo Assignments are directly linked to the Allocation Viewer and are editable from the Customer Managed Alerts within the site. If the contact is created by a customer using the Allocation Viewer, the contact is automatically labeled as SoldTo Managed. If the contact is created within DTN TABS, link it to the correct SoldTos to make it editable. Do not link internal contacts to SoldTos in order to prevent edits.
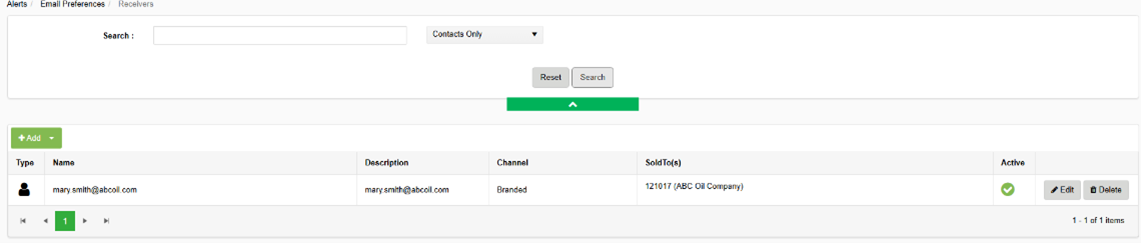
Searching for a Contact:
- Change the dropdown to display Contacts Only.
- Enter your search criteria and Search
Creating a New Alerts Receiver List
Alerts Receiver Lists group individual contacts into a distribution list that can be used to send alerts. These lists can be created based on internal service groups or can be used to group individual email addresses from an external client. For example, all individual ABC Oil email addresses can be assigned to a group.
- Select ADD, then Receiver List. A pop up page displays.

- Enter the receiver list name.
- Enter a description, if desired.
- Select a channel, if applicable.
- Select contacts as needed
- Select SoldTos, if applicable.
- Save.
- The new receiver list displays.

Searching for a Receiver List:
- Change the dropdown to display Receiver Lists Only.
- Enter your search criteria and Search
- Available lists will display
Note: SoldTo Assignments are directly linked to the Allocation Viewer/Visibility and are editable from the Customer Managed Alerts within the site. If the receiver list is created by a customer using the Allocation Viewer/Visibility, the contact is automatically labeled as SoldTo Managed. If the contact is created within DTN TABS, link it to the correct SoldTos to make it editable. Do not link internal contacts to SoldTos in order to prevent edits.
Note: With the appropriate permissions, you can edit or delete a list by selecting the Edit or Delete links next to each list in the Alerts Receiver Lists panel.
Adding a Contact to a Receiver List
Assigning a contact to a receiver list can be completed in several ways.
- Select Edit next to the Contact.
- Select the appropriate Receiver List and Save.
- Select Edit next to the Receiver List.
- Select the Contact from the drop down menu and Save.
Setting Up an Alerts Sender List
The Alerts Sender List screen makes it possible to enter the email or text message addresses of the sender(s) of the alert notification.
Here’s how to view the current Alerts Sender List:
- From the Alerts menu, select Senders under the Email Preferences The Alerts Senders List page opens.
Creating a New Sender
Here’s how to create a new Sender:
- Click
 . The Alerts Sender List pane opens.
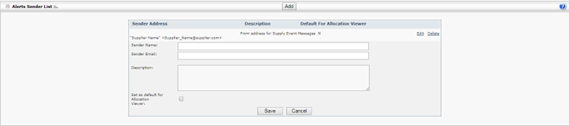
 - Enter the following information about the Sender:
| Description | |
| Sender Name | Provides the name of the sender. |
| Sender Email | Specifies the email address of the sender. |
| Description | Contains the name or other description for the sender. |
| Set as default for Allocation Viewer | Indicates the sender to be used for Allocation Viewer created Alerts, if selected.
|
- Click
 . The Sender appears on the Alerts Sender List and can now send alerts.
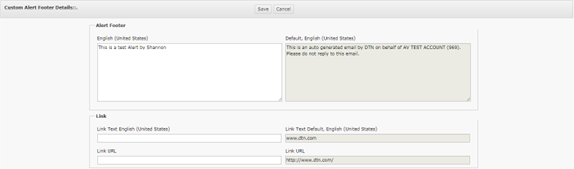
Setting up a Custom Alert Footer
The Custom Alert Message Setup page creates a custom message that appears at the bottom of any Credit or Product Allocation Alert sent out. This directs customers to call customer service or to go to the website that contains the Allocation Viewer.
Here’s how to view the current Custom Alerts Footer:
- From the Alerts menu, select Footer under the Email Preferences list.
- The Custom Alert Footer page opens.
Adding a Custom Alert Footer

Here’s how to add a Custom Alert Footer
- Select the Alert type and language for the Alert. Select Add.
- The Alert Footer template displays.
- Enter the necessary information in the Alert Footer section and enter Links, if applicable.
- Save
- The footer now appears
Editing the Custom Alert Footer
Here’s how to edit the Custom Alert Footer:
- Select the type of alert to be edited from the Alert Type drop-down field.
- Select the language from the Language drop-down field.
- Select Search to view Footers
- Click
 of the alert to be edited.
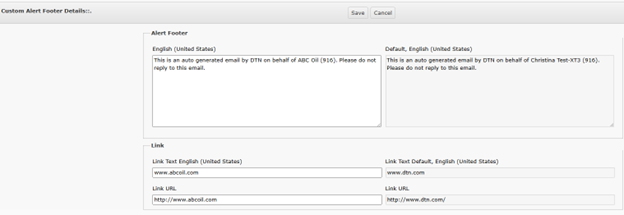
 - In the Custom Alert Footer Details panel, enter the text to appear at the bottom of product and credit allocation alerts.
- Note: This field is limited to 500 characters. Any message over 500 characters is truncated.
- Enter the name of a URL to direct clients to in the URL Text field, if desired.
- Enter the web address of the URL to direct clients to in the URL Links field, if desired.
- Click .
Setting up an Alert
The alerts listed may be created. Not all alerts will be available depending on the TABS modules being used.
Note: if a paper clip is displayed on an Alert setup page, you must click it after entering the associated data. That assigns the information to the alert.
- Contract: Notifies recipients when a contract is within a specified number of days from its expiration and the customer has not lifted the specified percentage of the contract.
- Conversion Error: Allows users to assign contacts to the alerts and can be separated by document type.
- Credit Allocation: Warns personnel or customers when a credit allocation goes below a configurable percentage
- Delivery Error: Identifies conversion and cross-reference errors for pre-orders.
- Deny: Warns personnel when a Setup Denial (ex – Deny 5 – Invalid Consignee), Credit Denial (ex – Deny 9 – Credit Allocation Exhausted), Product Denial (ex – Deny 10 – Product Allocation Exhausted), or a Customer Specific Deny Alert (ex – Client XYZ’s marketing representative wants to know if they receive any denials so they can proactively respond and correct if needed) occurs.
- Forecast: indicates when a forecast record is available for review, additional records have been created, records have been changed, customer change requests have been made, volume changes have been made that exceed terminal tolerance settings, records have been finalized, or if any of the validation flags have not been removed when the records go in to a Finalized status.
- GPO Request: allows Admin users to specify which email addresses the GPO requests are sent to per terminal or list of terminals.
- Master Data: notifies when any Master Data file is received from the SAP Master Data Feed with the Summary Alert. The Error Alert notifies of any transactions that cause an error in processing within the Master Data Feed. Note: This alert is only visible if your TABS account has Master Data enabled.
- No Load BOL: notifies when a Consignee cards in at a terminal but does not load. The terminal will send a no Load BOL to reconcile the authorization number.
- Override: informs personnel when a Deny occurs then within the timeframe specified that DTN TABS receives an unauthorized BOL (CB or BL Unauth) for the same terminal/consignee that was denied.
- Pre-Order Hold Status: Informs personnel when a pre-order change status to Hold and when the status changes from Hold to Open.
- Product Allocation: notifies personnel or customers when a product allocation either is refreshed, goes below a configurable percentage, or does/does not lift a configurable percentage within the timeframe indicated. This is the most common alert that goes to both internal and external users of TABS.
- Supply Event: allows different email templates for each country and channels for these alerts. These are only available if Supply Event Notification is being used.
- Terminal Inactivity: notifies personnel when a terminal stops sending DTN TABS any information within a specified amount of time. There is also an optional Terminal Resumed Activity alert that can be selected within this configuration.
- Terminal Product Performance: monitor the liftings for each product at a terminal and alerts when the liftings are within a specified percentage of the total allocation amount. The Terminal Product Performance alert also monitors liftings for a group of products.
- Truck Size: notifies when the sum of the product amounts of multiple BOLs, of the same authorization, is greater than the expected truck size.
- Unauthorized Load: informs when an unauthorized load is pulled at a DTN TABS terminal. Alerts can be configured at terminal, terminal group or all terminals levels for easy setup. Since unauthorized loads can often occur in groups, it is recommended that the number of minutes between alerts be determined when multiple unauthorized loads are detected at the same terminal. Once an authorized load is received at the terminal, a summary alert is generated informing of the total number of unauthorized loads and the time span during which they occurred.
Alerts Report
The Alerts Report provides a summary of all alert notifications that were automatically generated by DTN TABS.
Note: See the DTN TABS Reports Training Manual for more information on the Alerts Report.
