DTN TABS Mapping
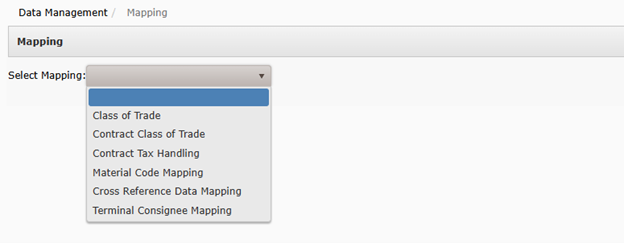
Mapping in DTN TABS allows for customization of data to meet internal and external requirements. Mapping options include:
- Class of Trade
- Contract Class of Trade
- Contract Tax Handling
- Material Code Mapping
- Cross Reference Data Mapping
- Terminal Consignee Mapping
Setting up Mapping
From the Data Management menu, select Mapping. The Mapping page displays.
Class of Trade
Setting up Class of Trade
- To configure Class of Trade mapping, select Class of Trade from the Select Mapping menu.
- Select Add New Record to create a new mapping record.
- Enter the following fields:
- ERP Channel – Represents the channel name in your ERP system.
- Channel Description – Provides a description of the channel.
- Click Update to save.
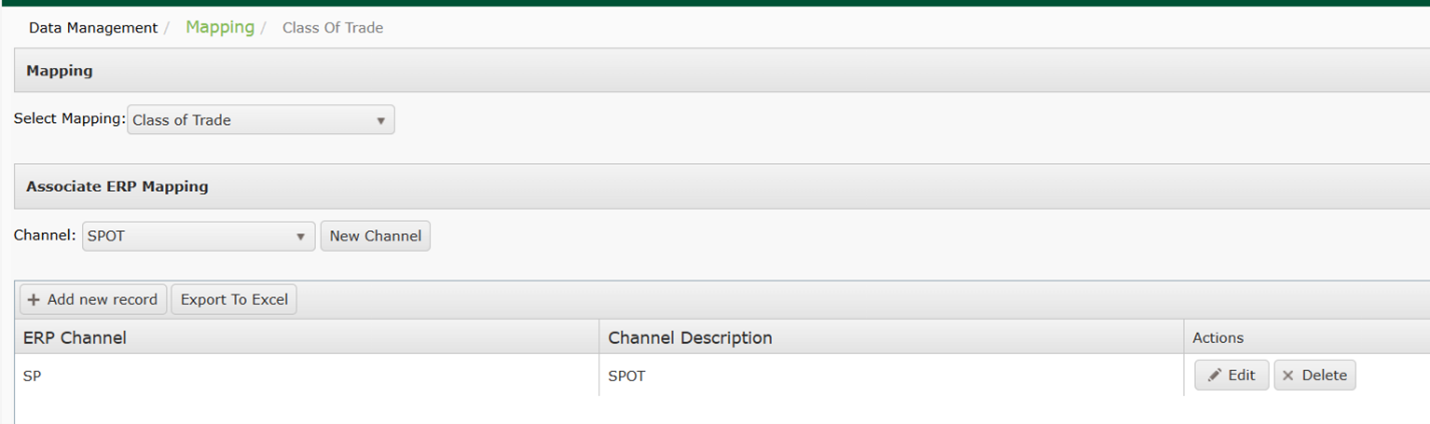
Searching for Class of Trade
- To search for Class of Trade, select Class of Trade from the Select Mapping menu.
- Select a channel in the Associate ERP Mapping dropdown.
- Results will be displayed in the chart below.

Exporting Class of Trade
- To export Class of Trade, select Class of Trade from the Select Mapping menu.
- Select Export to Excel.

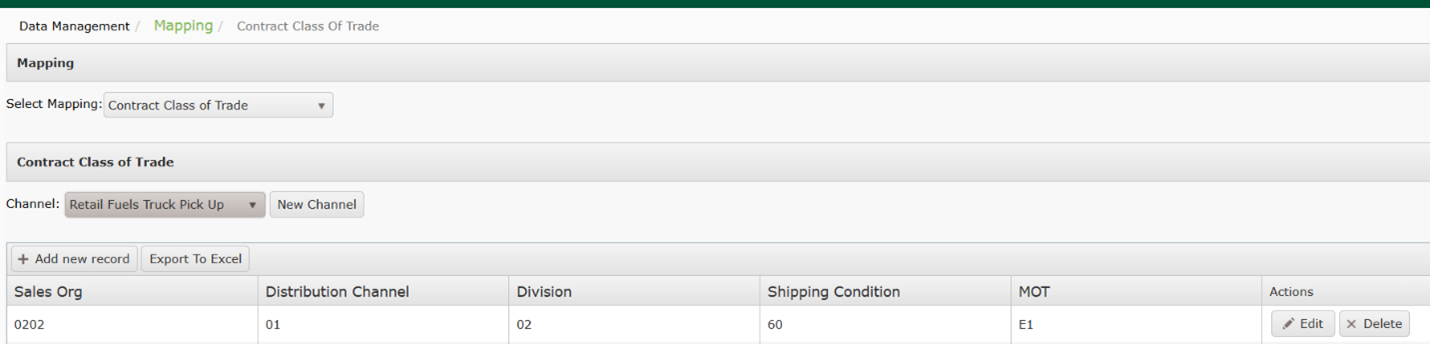
Contract Class of Trade
Setting up Contract Class of Trade
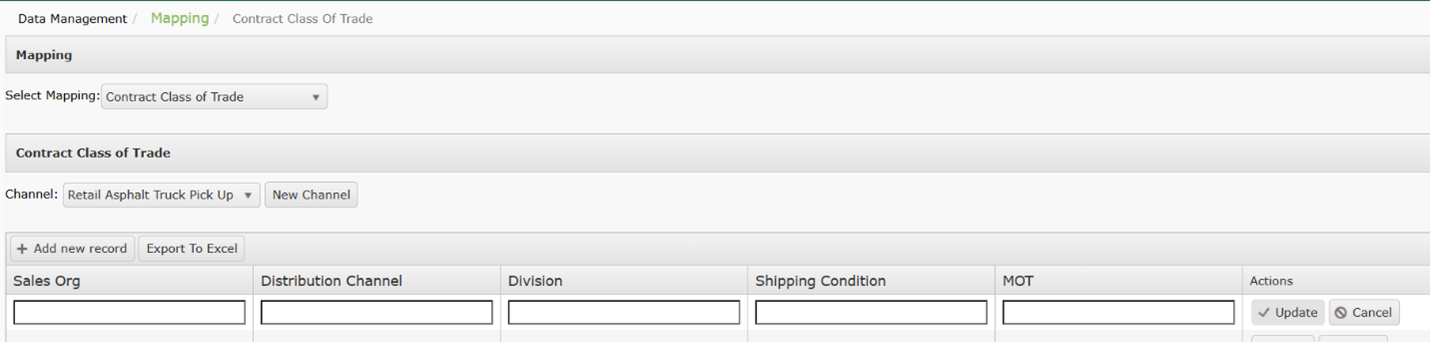
- To configure Contract Class of Trade mapping, select Contract Class of Trade from the Select Mapping menu.
- Select a channel in the Contract Class of Trade menu.
- Select Add New Record to create a new mapping record.
- Enter the following fields:
- Sales Org (required): Identifies what division of sales is responsible for the customer.
- Distribution Channel (required): Identifies what distribution channel the customer belongs to.
- Division (required): Identifies the division the customer belongs to.
- Shipping Condition (required): Identifies the priority of the shipment.
- MOT (optional): Identifies the Mode of Transportation.
Searching for Contract Class of Trade
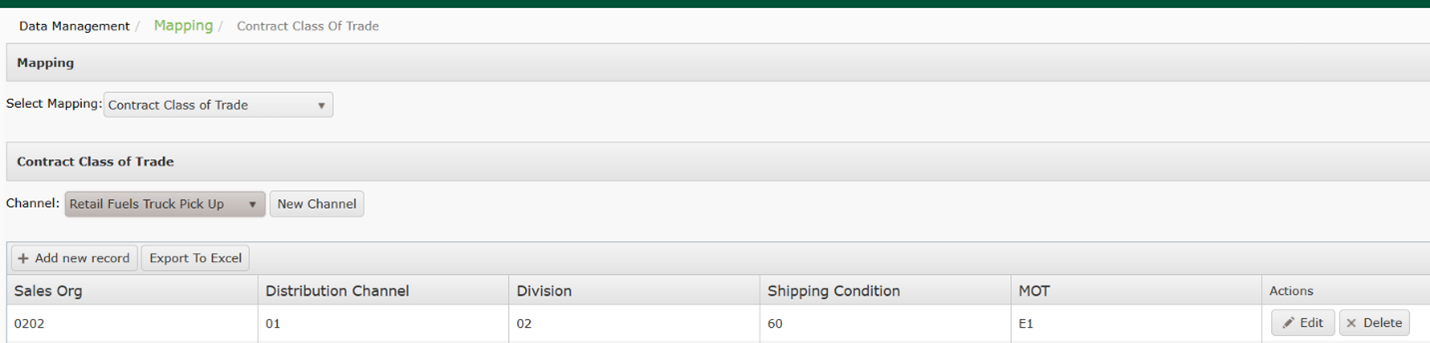
- To search for Contract Class of Trade, select Contract Class of Trade from the Select Mapping menu.
- Select a channel in the Contract Class of Trade
- Results will be displayed in the chart below.
Exporting Contract Class of Trade
- To export Contract Class of Trade, select Contract Class of Trade from the Select Mapping menu.
- Select Export to Excel.

Modifying Contract Class of Trade
- To modify Contract Class of Trade, select Contract Class of Trade from the Select Mapping menu.
- Select a channel in the Contract Class of Trade dropdown.
- Results will be displayed in the chart below.
- Click Edit.
- Make any required changes and select Update.
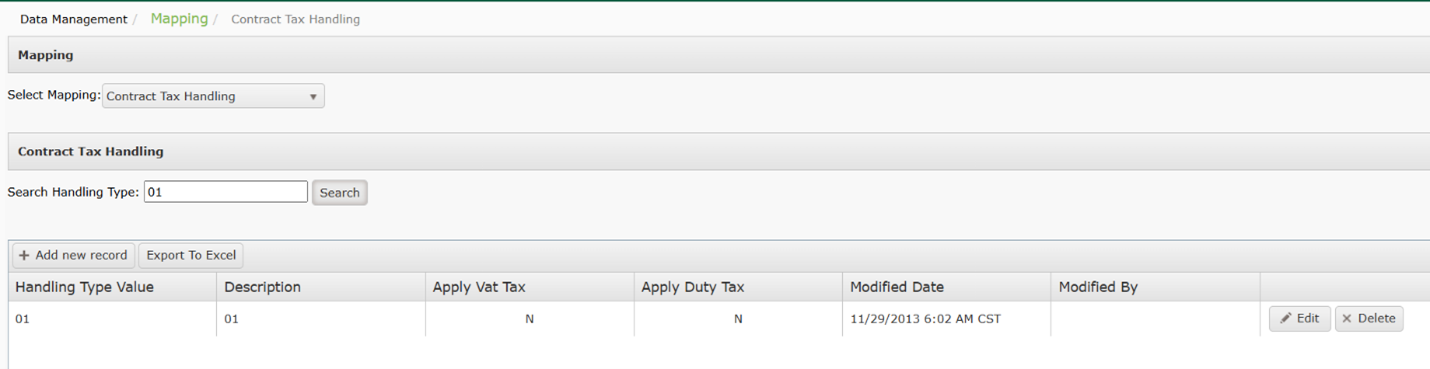
Contract Tax Handling
Setting up Contract Tax Handling
- To configure Contract Tax Handling mapping, select Contract Tax Handling from the Select Mapping menu.
- Select Add New Record to create a new mapping record.
- Enter the following fields:
- Handling Type Value (required): User defined abbreviation that matches information stored in your ERP or billing system for tax settings.
- Description (required): Describes the Handling Type Value.
- Apply Vat Tax (optional): If selected, this handling type will have VAT (Value Added Tax) applied.
- Apply Duty Ta (optional): If selected this handling type will have the Duty Taxy applied
Searching for Contract Tax Handling
- To search for Contract Class of Trade, select Contract Tax Handling from the Select Mapping menu.
- Enter a keyword in the Search Handling Type box.
- Results will be displayed in the chart below.

Exporting Contract Tax Handling
- To export Contract Tax Handling, select Contract Tax Handling from the Select Mapping menu.
- Select Export to Excel.
Modifying Contract Tax Handling
- To modify Contract Tax Handling, select Contract Tax Handling, from the Select Mapping menu.
- Select a channel in the Contract Class of Trade dropdown.
- Results will be displayed in the chart below.
- Click Edit.
- Make any required changes and select Update.

Material Code Mapping
The Material Code Mapping feature is designed to use your ERP or billing system Material/PIDX codes to define DTN TABS products instead of using the terminal-defined product codes (PIDX or other code). Then, each material code can be mapped to different product code translations depending on the connection type (i.e. Terminal, CPDP, GXS, etc.).
Because of the various connection types, there are many different product codes coming into DTN TABS from the terminals. These terminal product codes are converted into the seller’s defined codes for processing and reporting.
For example, your ERP/Billing system has a Material Code of 123456 that represents ULSD #2 Clear. The terminal is sending a PIDX code of V95 to represent this product. Using the Material Code Mapping feature, DTN TABS can be set up to know that V95=123456.
In another example, your ERP/Billing system has a PIDX code of V95 that represents ULSD #2 Clear. The terminal is sending an incorrect or outdated PIDX code of G95 to represent the product. Using the Material Code mapping feature, DTN TABS can be set up to know that G95=V95.
The Material Codes can be used for forecasting, allocations, BOL retrieval, and reporting. You can group your Material Codes into product groups using the Product Group Setup screen.
Note: For more information on the Product Group Setup page, see DTN TABS Initial Setup – Database Training Manual 2.
Once Material Code Mapping has been activated by the DTN TABS Support team, you can use the Product Setup page to add your ERP or billing system Material codes.
Then, you can use the Terminal Setup page to assign your ERP or billing system Material codes to the terminals.
Note: For more information on the Terminal Setup and Product Group Setup page, see DTN TABS Initial Setup – Database Training Manual 2.
Note: If Material Code Mapping is utilized, then the usage of the Plant ID in terminal setup becomes mandatory in order for DTN TABS to return the proper responses back to the TAS for loading.
Setting up Products
With the Material Code Mapping feature enabled, ERP or billing system Material Codes can be added to DTN TABS and then mapped to the terminal or other data source codes. This enables you to then use your Material Codes for Product Groups and terminal assignments within the DTN TABS system.
From the Setup menu, select Product Setup. The Product Details page opens.
Searching for a Product
The Search Products panel allows you to search by Proprietary name or Product Code either using a keyword or searching for all available options by leaving the Key Word field blank.

Here’s how to search for a product:
- Enter a Proprietary Name or Product Code in the Key Word
- From the Search by arrow, select either the Proprietary Name or Product Code.
- Click Search. Your Available Products displays a dropdown with the search results.
- Select a product from the Your Available Products The following panels display based on the product selection:
- Product Details
- Product Associations
- Assign To Product Group
The Product Details panel auto fills based on the search criteria. This information begins the process of adding new products to your database.
- Proprietary Name
- Identifies a product by the name commonly used for that product. This name displays in reports.
- Product Code
- Describes the ERP or billing system material code. This is a required field and contains a maximum of 20 characters.
- Maximum Density
- Contains the maximum mass per unit of volume for the given material code (xxxx.xxxx).
- Minimum Density
- Specifies the minimum mass per unit of volume for the given material code {(-)xxxx.xxxx}.
- Average Density
- Provides the average mass per unit of volume for the given material code (xxxx.xxxx)
Note: Max, Min, and Average Density are reserved for future use and are therefore not required.
The Product Associations panel provides a list of all terminals the product is assigned to.

- Terminals for
- Lists the terminals to which the selected product is assigned.
The Assign to Product Groups panel provides a list of all product groups in your DTN TABS database and product groups that contain the product. You can also assign the product to a product group.

- Available Groups
- Lists the product groups for with the product code is currently no assigned to.
- Assigned Groups
- Lists the product groups to which the selected products belongs.
Material Code Mapping Panel
The Material Code Mapping panel provides a detailed summary of existing mappings. From this panel, you can access the add, edit, or delete options for a material code.
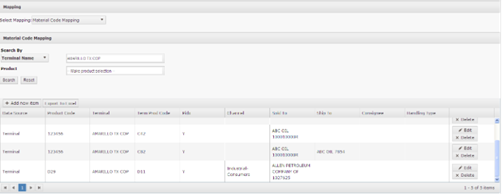
Definitions for the material code mapping search results are:
- Search By
- Describes the criteria selected to find a terminal. Options are:
- Terminal Name
- Terminal SPLC
- Terminal City
- Terminal Plant
- Terminal
- Displays a terminal. When you select a terminal, the system populates the Product field with the products that have been assigned to the selected terminal.
- Product
- Identifies a product. When you select a terminal or terminal group first, the system populates the Product field with the products that have been assigned to the selected terminal or terminals.
- Data Source
- Specifies the source system of the product codes to be sent to DTN TABS. The current option is Terminal.
- Product Code
- Contains the Material Code that was defined in Product Setup and which is mapped to the terminal product from the specified data source.
- Terminal
- Defines the desired terminal to map to the specified Material Code.
- Term Prod Code
- Provides the terminal-defined product code sent by the source system.
- PIDX/Non PIDX
- Determines the field length of PIDX and Non-PIDX codes.
- If PIDX is selected, the field length is 4 characters to accommodate the PIDX Standard Product Codes.
- If Non PIDX is selected, the maximum field length is 20 characters.
- Channel
- Identifies the Class of Trade or Business line using this Material Code Map. This data field is optional.
- SoldTo
- Displays the SoldTo using this Material Code Map. This data field is optional.
- ShipTo
- Specifies the ShipTo using this Material Code Map. This data field is optional.
- Consignee
- Defines the Consignee using this Material Code Map. This data field is optional.
- Handling Type
- Describes the manner Contract Taxes should be applied. Defined in the Contract Tax Handling mapping screen for future use.
Add a new Material Code
Here’s how to add a material code:
Note: Only items marked with an * are required.
- Click +Add new item. The Edit Material Code page displays.
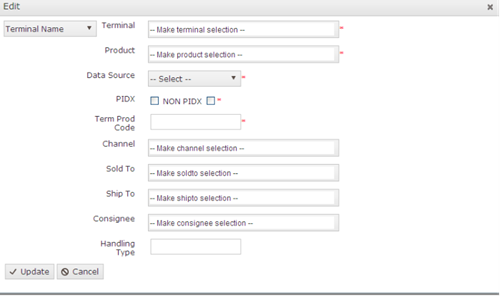
- Terminal
- Defines the desired terminal to map to the specified Material Code.
- Product
- Contains the Material Code that was defined in Product Setup and which is mapped to the terminal product from the specified data source.
- Data Source
- Specifies the source system of the product codes to be sent to DTN TABS. The current option is Terminal.
- PIDX/Non PIDX
- Determines the field length of PIDX and Non-PIDX codes.
- If PIDX is selected, the field length is 4 characters to accommodate the PIDX Standard Product Codes.
- If Non PIDX is selected, the maximum field length is 20 characters.
- Term Prod Code
- Provides the terminal-defined product code sent by the source system.
- Channel
- Identifies the Class of Trade or Business line using this Material Code Map. This data field is optional.
- SoldTo
- Displays the SoldTo using this Material Code Map. This data field is optional.
- ShipTo
- Specifies the ShipTo using this Material Code Map. This data field is optional.
- Consignee
- Defines the Consignee using this Material Code Map. This data field is optional.
- Handling Type
- Describes the manner Contract Taxes should be applied. Defined in the Contract Tax Handling mapping screen for future use.
2. Add the new material code in the appropriate fields and click Update for the material code information.
3. You can view the added information in the list on the Material Code Mapping
Edit a Material Code
Here’s how to edit a material code:
- Click Edit and the Edit Material Code page displays.
- Modify the desired fields and click Update for the material code information.
You can then view updated information in the list on the Material Code Mapping panel.
Export Material Codes
Material codes for a specific terminal can be exported to an Excel spreadsheet for emailing or downloading into a back-office application.
Here’s how to export material code for a specific terminal to an Excel spreadsheet:
- Select Export to Excel. The File Download window displays.
- Select one of the following options:
- Open
- Opens the file online.
- Save
- Provides a Save As box to specify a file name and location for the export file.
- Cancel
- Cancels the action.
Cross Reference Data Mapping
To communicate with terminals, TABS will need to do several data conversions and mappings which will be entered and maintained by the seller. Cross references mappings can be added by using the TABS UI or uploading via the provided Excel template. Cross references tables can also be exported to Excel for viewing.
CPDP Title Change
Setting up CPDP Title Chain
CPDP Title Chain is used for preorders that originate from TABS. It defines the title chain that is sent to CPDP for these preorders. CPDP Title Chains may be created manually on the configuration page or via an upload.
To configure CPDP Title Chain mapping from the configuration page, select CPDP Title Chain from the Cross Reference Data Mapping menu.
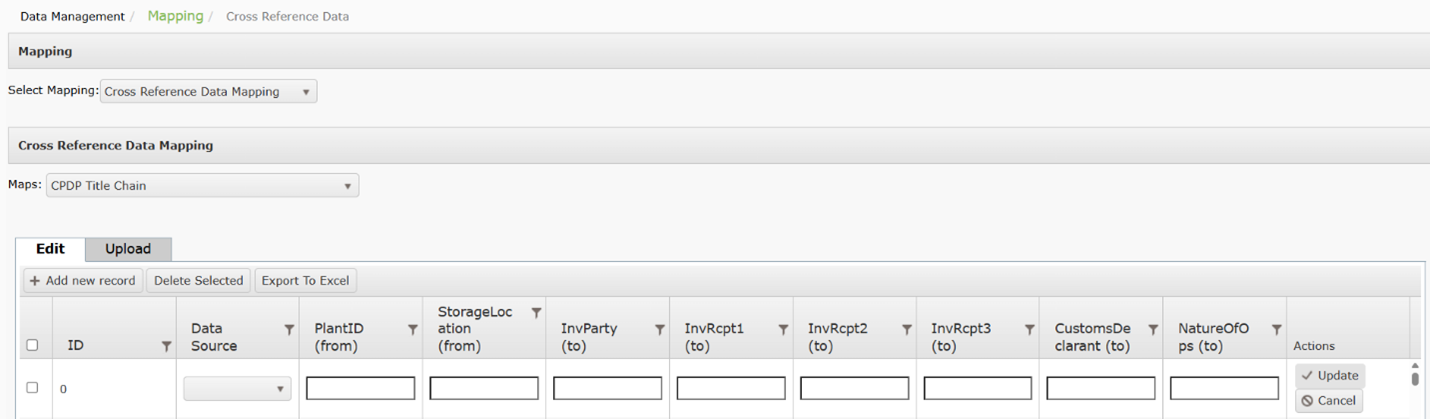
Select Add New Record
Enter the following fields:
- ID
- Data Source – Represents the source of the data.
- PlantID (from)
- StorageLocation (from)
- InvParty (to)
- InvRcpt1 (to)
- InvRcpt2 (to)
- InvRcpt3 (to)
- CustomsDeclarant (to)
- NatureOfOps (to)
Select Update to save the record.
- To configure CPDP Title Chain mapping via an upload, select CPDP Title Chain from the Cross Reference Data Mapping menu.
- Select Upload.
- Download the available template.
- Enter your values on the template and save.
- Select Choose File and Upload.
Searching for CPDP Title Chain
- To search for CPDP Title Chain, select CPDP Title Chain from the Select Mapping menu.
- Select CPDP Title Chain from the Maps dropdown.
- Results will be displayed in the chart below.

Exporting CPDP Title Chain
- To export CPDP Title Chain, select CPDP Title Chain from the Select Mapping menu.
- Select Export to Excel.
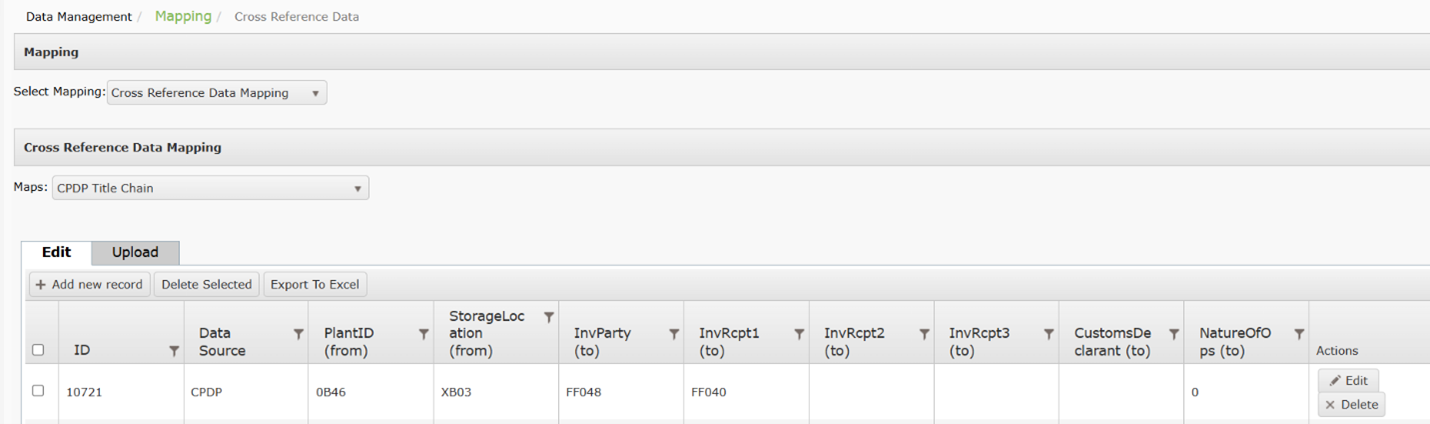
Modifying CPDP Title Chain
- To modify CPDP Title Chain, select Cross Reference Data Mapping from the Select Mapping menu.
- Select CPDP Title Chain from the Maps dropdown.
- Click Export to Excel.

Carrier Truck Type
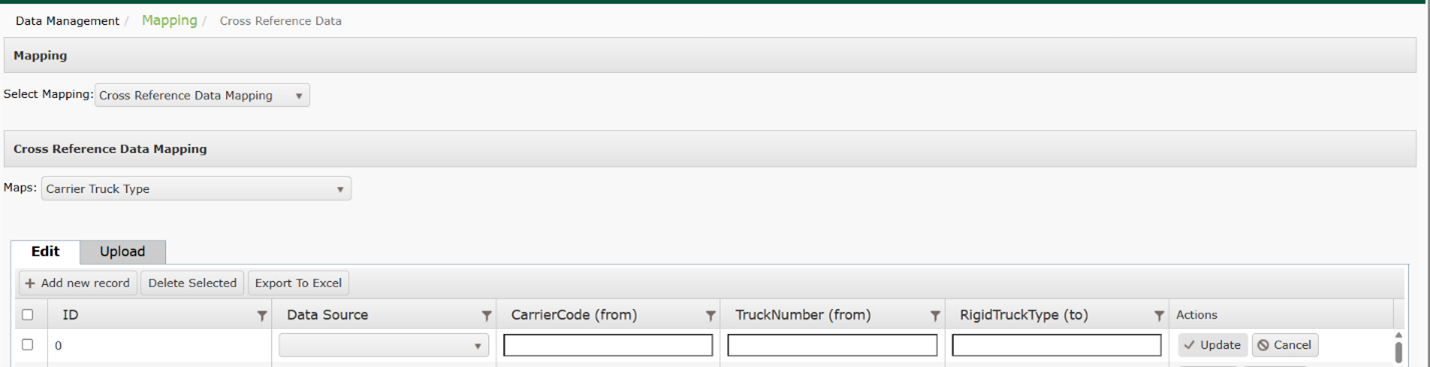
Setting up Carrier Truck Type
- To configure Carrier Truck Type mapping from the configuration page, select Cross Reference Data Mapping from the Select Mapping menu.
- Select Carrier Truck Type from the Maps dropdown.
- Select Add New Record.
- Enter the following fields:
- ID
- Data Source – Represents the source of the data.
- CarrierCode (from)
- TruckNumber (from)
- RigidTruckType (to)
- Select Update to save the record.
Searching for Carrier Truck Type
- To search for Carrier Truck Type, select Cross Reference Data Mapping from the Select Mapping menu.
- Select Carrier Truck Type from the Maps dropdown.
- Results will be displayed in the chart below.

Exporting Carrier Truck Type
- To export Carrier Truck Type, select Cross Reference Data Mapping from the Select Mapping menu.
- Select Export to Excel.
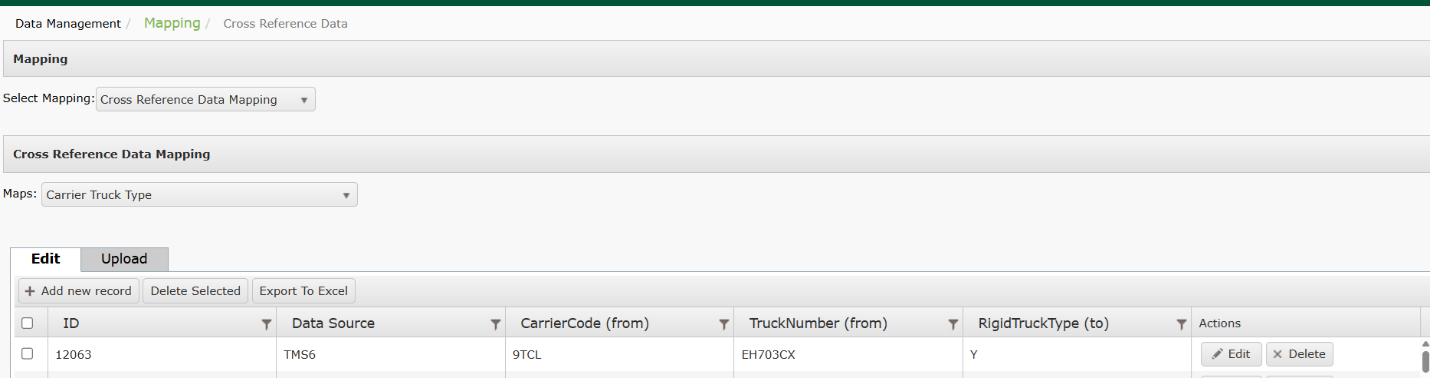
Modifying Carrier Truck Type
- To modify Carrier Truck Type, select Cross Reference Data Mapping from the Select Mapping menu.
- Select Carrier Truck Type from the Maps dropdown.
- Select Edit and make any required changes.
- Click Update to save.

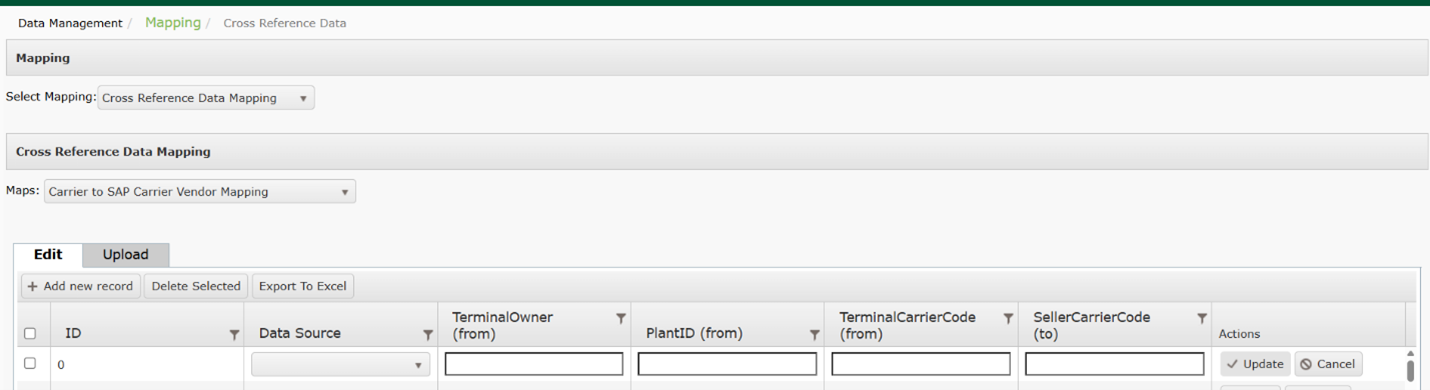
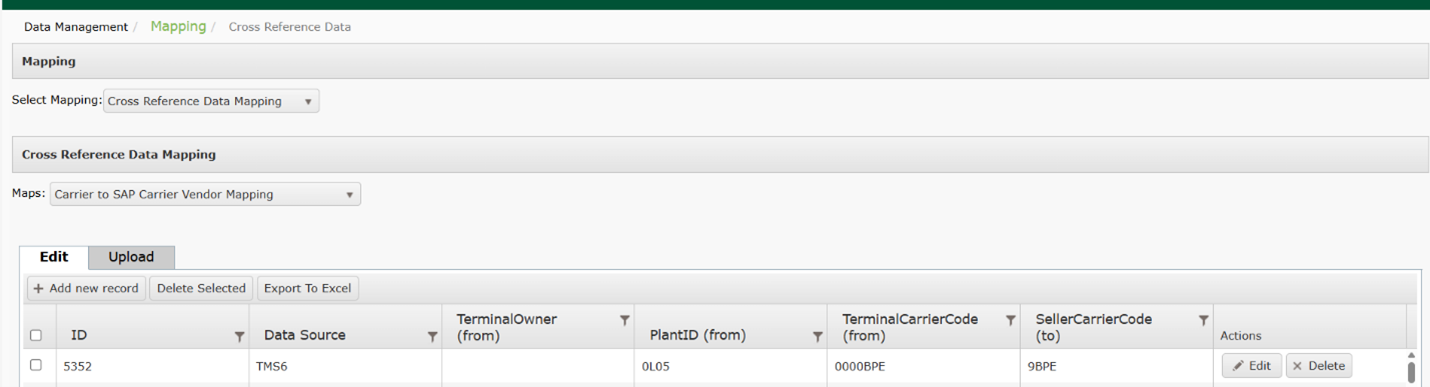
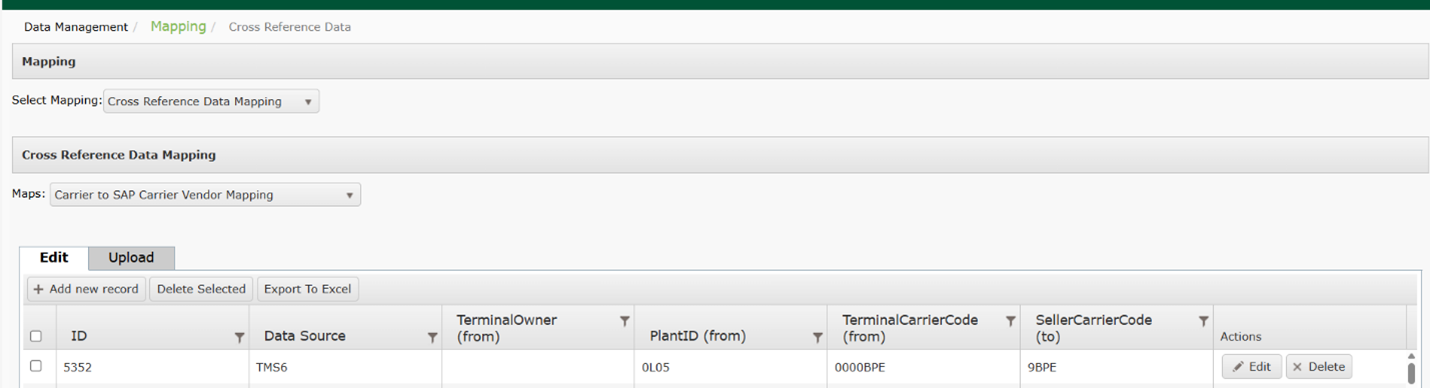
Carrier to SAP Carrier Vendor Mapping
Setting up Carrier to SAP Carrier Vendor Mapping
This mapping may be completed from the configuration page in TABS or via an upload.
- To setup mapping from the configuration page, select Mapping then Cross Reference Data Mapping from the dropdown menu.
- Select Carrier to SAP Carrier Vendor Mapping from the Maps
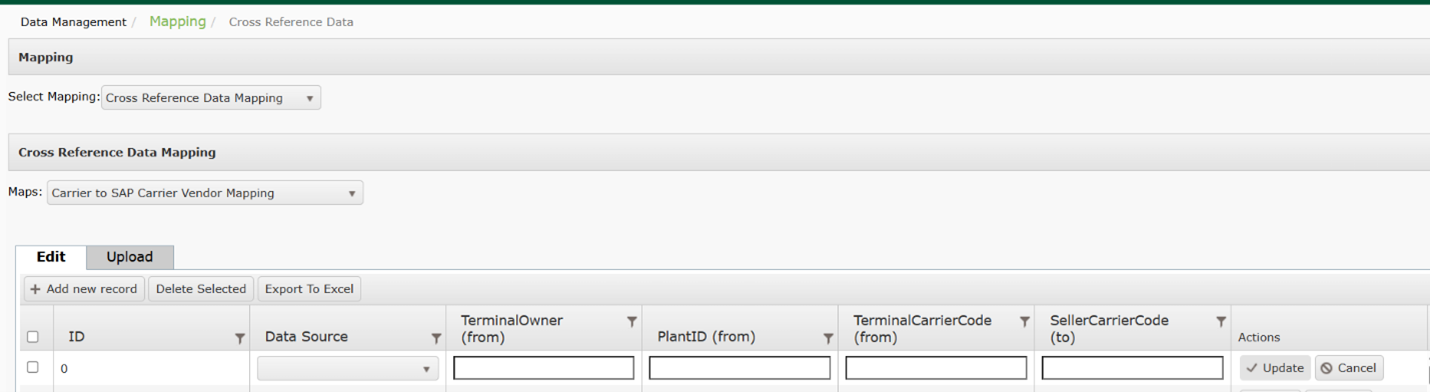
- Select Add New Record. Enter the following fields:
- Data Source (required): Identifies the source system of the product codes to be sent to DTN TABS.
- TerminalOwner (from)
- PlantID (from)
- TerminalCarrierCode (from)
- SellerCarrierCode (to)
- SAP Carrier (required): Identifies the SAP carrier that will map to the MOT carrier.
- Select Update to save the record.
- To configure Carrier to SAP Carrier Vendor Mapping via an upload, select Carrier to SAP Carrier Vendor Mapping from the Cross Reference Data Mapping menu.
- Select Upload.
- Download the available template.
- Enter your values on the template and save.
- Select Choose File and Upload.
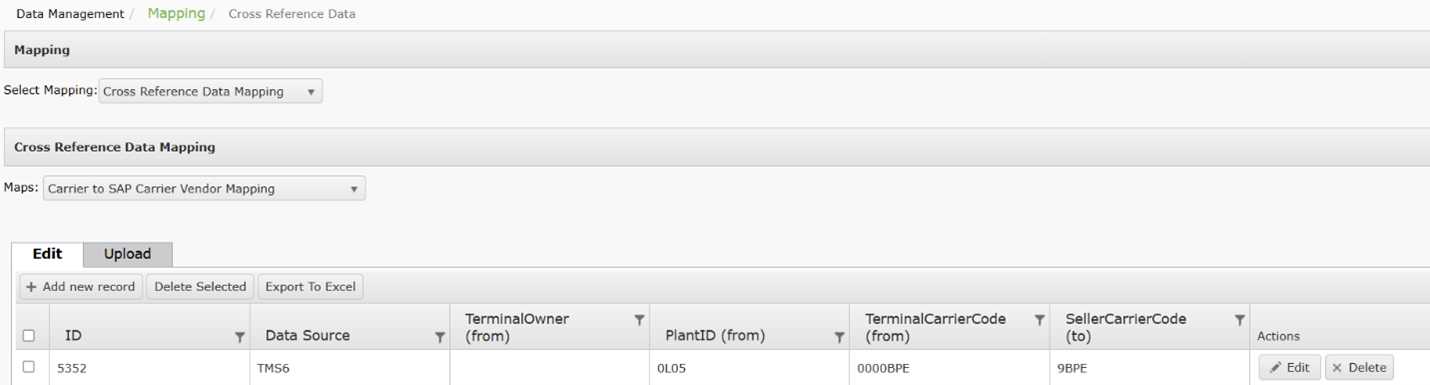
Searching for Carrier to SAP Carrier Vendor Mapping
- From the Setup menu, select Mapping then Cross Reference Data Mapping from the dropdown.
- Select Carrier to SAP Carrier Vendor Mapping from the Maps
- Results will be displayed in the chart below.
Exporting Carrier to SAP Carrier Vendor Mapping
- From the Setup menu, select Mapping then Cross Reference Data Mapping from the dropdown.
- Select Carrier to SAP Carrier Vendor Mapping from the Maps
- Select Export to Excel.

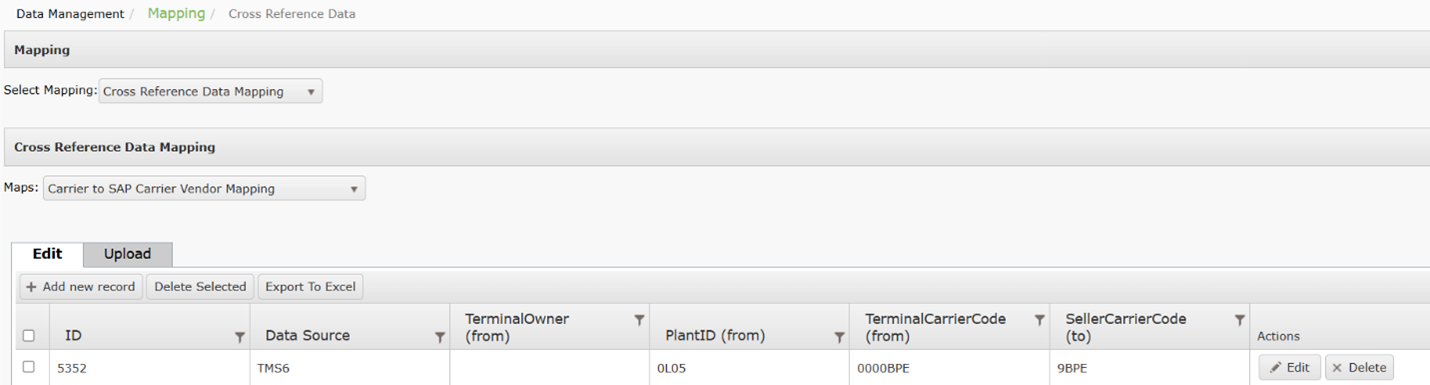
Modifying Carrier to SAP Carrier Vendor Mapping
- To modify Carrier to SAP Carrier Vendor Mapping, select Cross Reference Data Mapping from the Select Mapping menu.
- Select Carrier to SAP Carrier Vendor Mapping from the Maps dropdown.
- Select Edit and make any required changes.
- Click Update to save.
Company Code to SAP Company
Setting up Company Code to SAP Company
This mapping specifies mapping for a CPDP seller code to a TABS seller code.
This mapping may be completed from the configuration page in TABS or via an upload.
- To setup mapping from the configuration page, select Mapping then Cross Reference Data Mapping from the dropdown menu.
- Select Company Code to SAP Company from the Maps
- Select Add New Record. Enter the following fields:
- Data Source (required): Identifies the source system of the product codes to be sent to DTN TABS.
- TerminalOwner (from)
- PlantID (from)
- TerminalCarrierCode (from)
- SellerCarrierCode (to)
- Select Update to save the record.
- To configure Company Code to SAP Company via an upload, select Company Code to SAP Company from the Cross Reference Data Mapping menu.
- Select Upload.
- Download the available template.
- Enter your values on the template and save.
- Select Choose File and Upload.
Searching for Company Code to SAP Company
- From the Setup menu, select Mapping then Cross Reference Data Mapping from the dropdown.
- Select Company Code to SAP Company from the Maps
- Results will be displayed in the chart below.
Exporting Company Code to SAP Company
- From the Setup menu, select Mapping then Cross Reference Data Mapping from the dropdown
- Select Company Code to SAP Company from the Maps
- Select Export to Excel.
Modifying Company Code to SAP Company
- To modify Carrier to SAP Carrier Vendor Mapping, select Cross Reference Data Mapping from the Select Mapping menu.
- Select Company Code to SAP Company from the Maps dropdown.
- Select Edit and make any required changes.
- Click Update to save.

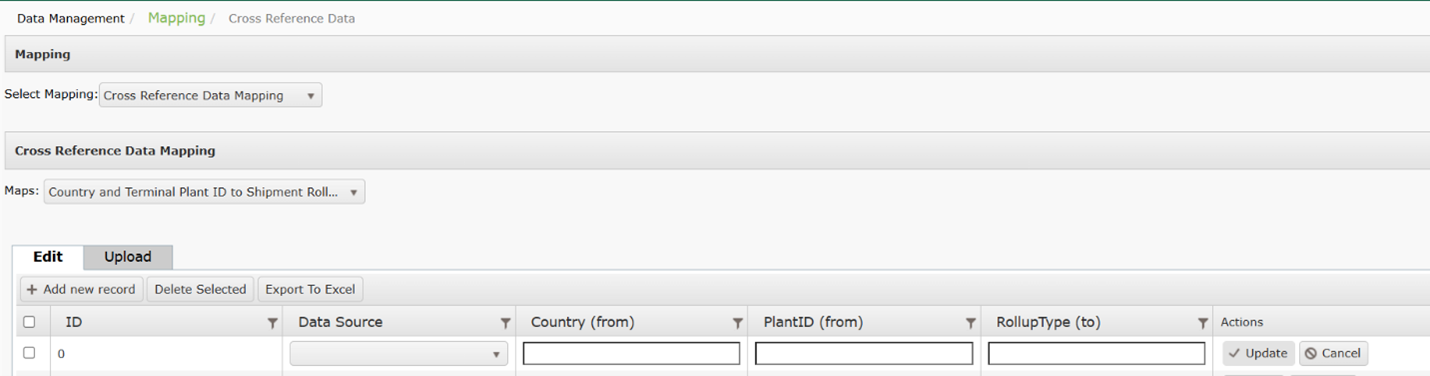
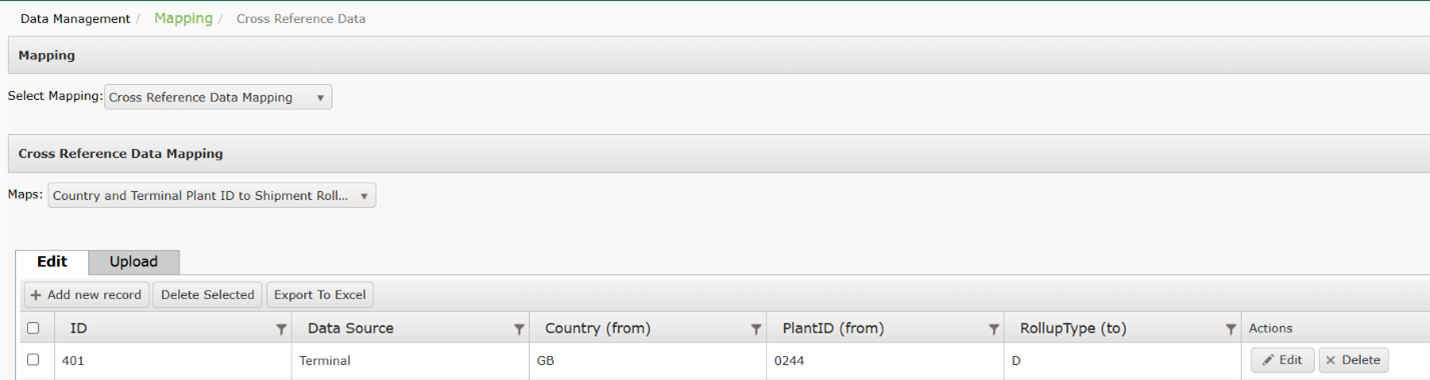
Country and Terminal Plant ID to Shipment Rollup Type
Setting up Country and Terminal Plant ID to Shipment Rollup Type
This mapping may be completed from the configuration page in TABS or via an upload.
- To setup mapping from the configuration page, select Cross Reference Data Mapping.from the dropdown menu.
- Select Country and Terminal Plant ID to Shipment Rollup Type from the Maps
- Select Add New Record. Enter the following fields:
- Data Source (required): Identifies the source system of the product codes to be sent to DTN TABS.
- Country (from)
- PlantID (from)
- RollupType (to)
- Select Update to save the record.
- To configure Country and Terminal Plant ID to Shipment Rollup Type via an upload, select Country and Terminal Plant ID to Shipment Rollup Type from the Cross Reference Data Mapping menu.
- Select Upload.
- Download the available template.
- Enter your values on the template and save.
- Select Choose File and Upload.
Searching for Country and Terminal Plant ID to Shipment Rollup Type
- From the Setup menu, select Mapping then Cross Reference Data Mapping from the dropdown.
- Select Country and Terminal Plant ID to Shipment Rollup Type from the Maps
- Results will be displayed in the chart below.

Exporting Country and Terminal Plant ID to Shipment Rollup Type
- From the Setup menu, select Mapping then Cross Reference Data Mapping from the dropdown
- Select Country and Terminal Plant ID to Shipment Rollup Type from the Maps
- Select Export to Excel,

Modifying Country and Terminal Plant ID to Shipment Rollup Type
- To modify Country and Terminal Plant ID to Shipment Rollup Type, select Cross Reference Data Mapping from the Select Mapping menu.
- Select Country and Terminal Plant ID to Shipment Rollup Type from the Maps dropdown.
- Select Edit and make any required changes.
- Click Update to save.
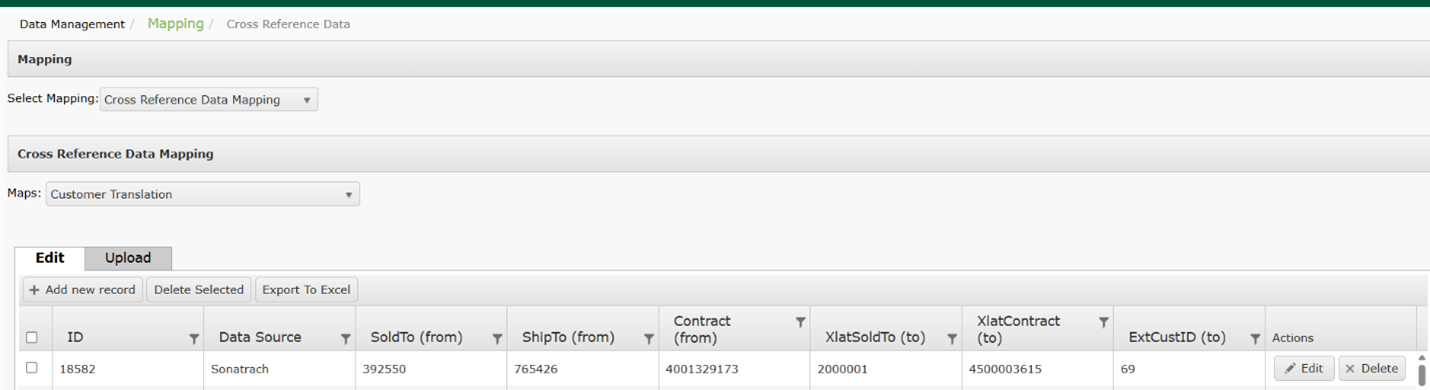
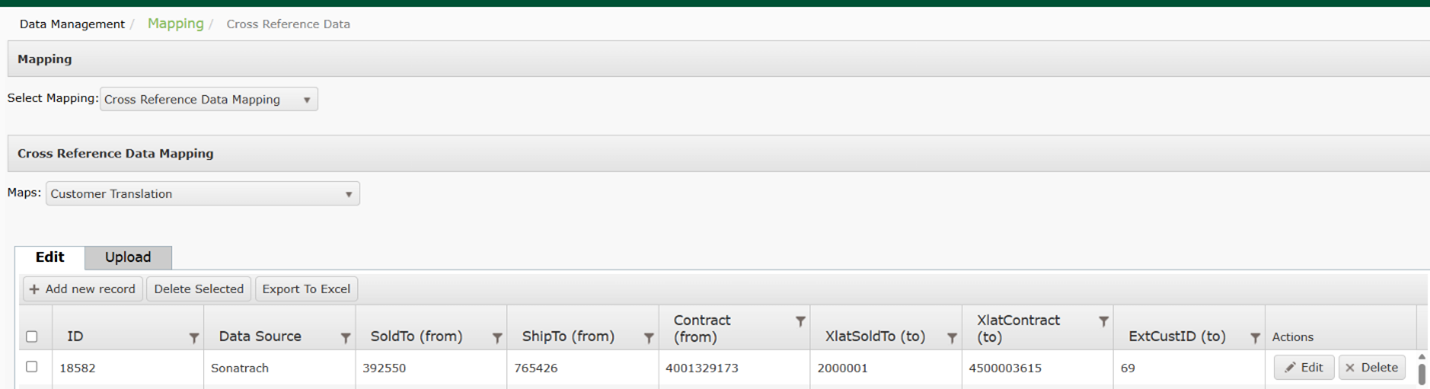
Customer Translation
Setting up Customer Translation
This mapping may be completed from the configuration page in TABS or via an upload.
- To setup mapping from the configuration page, select Cross Reference Data Mapping.from the dropdown menu.
- Select Customer Translation from the Maps
- Select Add New Record. Enter the following fields:
- Data Source (required): Identifies the source system of the product codes to be sent to DTN TABS.
- SoldTo (from)
- ShipTo (from)
- Contract (from)
- XlatSoldTo (to)
- XlatContract (to)
- ExtCustID (to)
- Select Update to save the record.

- To configure Customer Translation via an upload, select Customer Translation from the Cross Reference Data Mapping menu.
- Select Upload.
- Download the available template.
- Enter your values on the template and save.
- Select Choose File and Upload.
Searching for Customer Translation
- From the Setup menu, select Mapping then Cross Reference Data Mapping from the dropdown.
- Select Customer Translation from the Maps
- Results will be displayed in the chart below.
Exporting Customer Translation
- From the Setup menu, select Mapping then Cross Reference Data Mapping from the dropdown
- Select Customer Translation from the Maps
- Select Export to Excel.
Modifying Customer Translation
- To modify Customer Translation, select Cross Reference Data Mapping from the Select Mapping menu.
- Select Customer Translation from the Maps dropdown.
- Select Edit and make any required changes.
- Click Update to save.

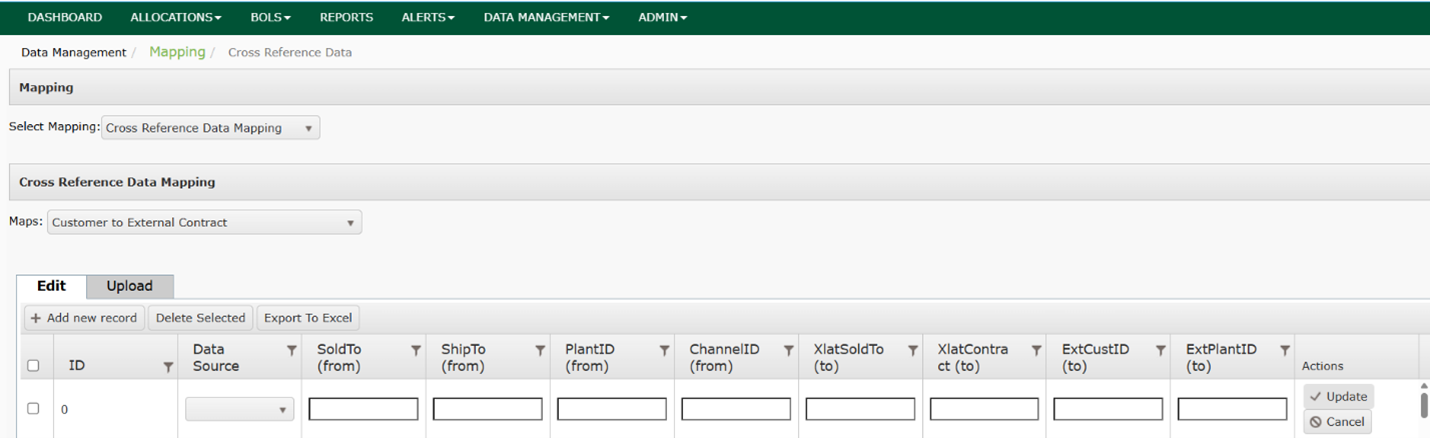
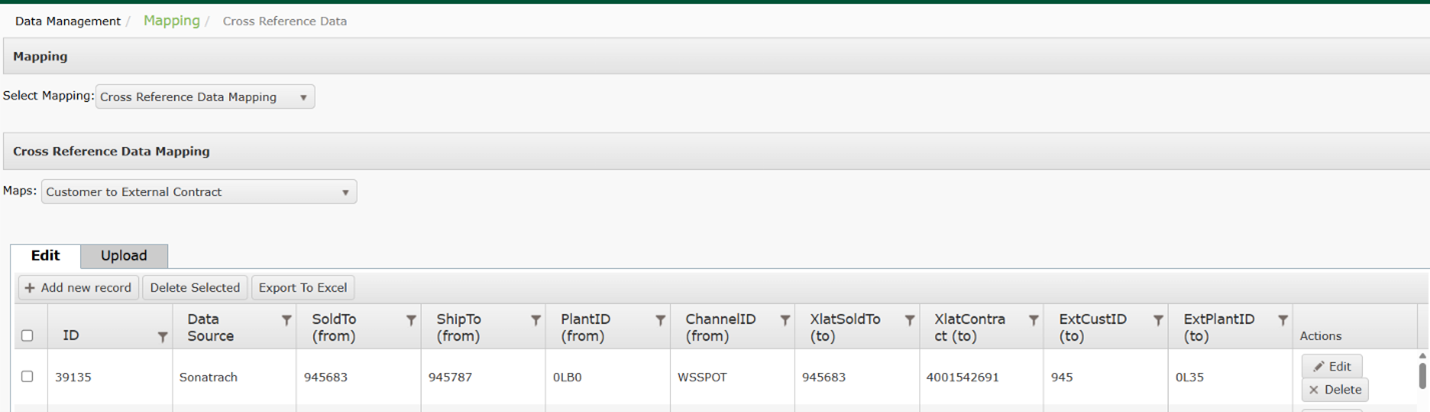
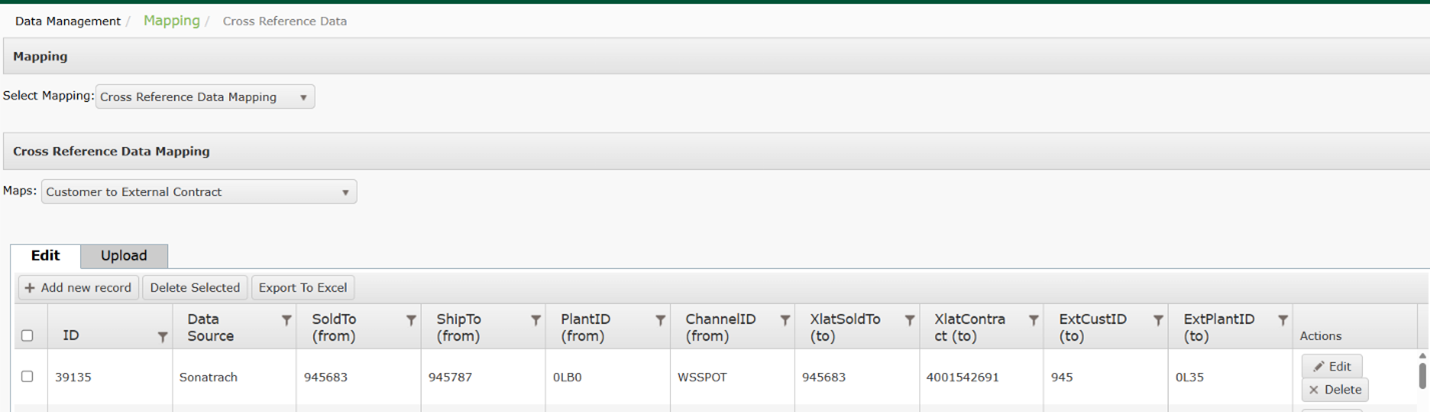
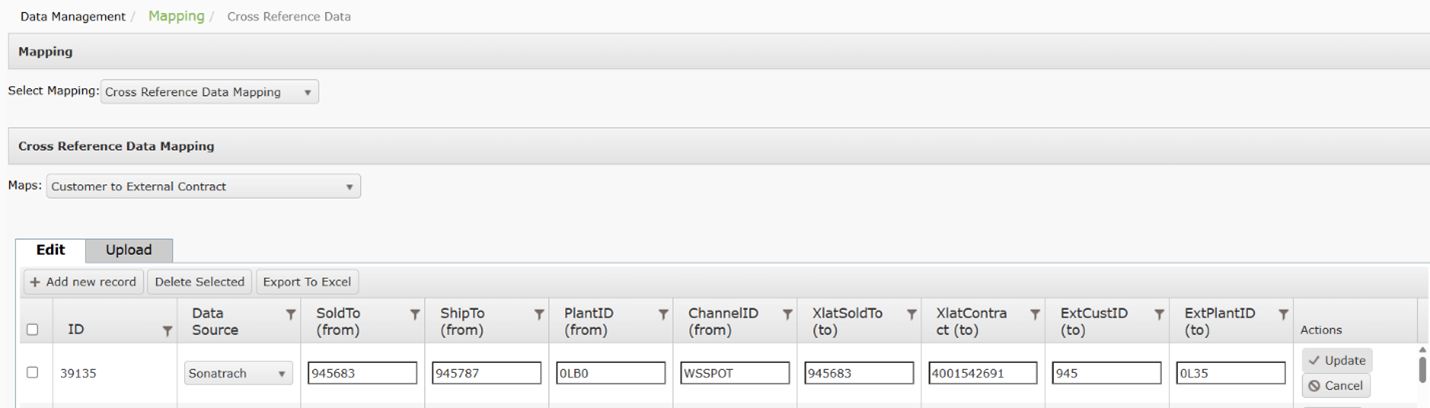
Customer to External Contract
Setting up Customer to External Contract
This mapping may be completed from the configuration page in TABS or via an upload.
- To setup mapping from the configuration page, select Cross Reference Data Mapping.from the dropdown menu.
- Select Customer to External Contract from the Maps
- Select Add New Record. Enter the following fields:
- Data Source (required): Identifies the source system of the product codes to be sent to DTN TABS.
- SoldTo (from)
- ShipTo (from)
- PlantID (from)
- ChannelID (from)
- XlatSoldTo (to)
- XlatContract (to)
- ExtCustID (to)
- ExtPlantID (to)
- Select Update to save the record.
- To configure Customer to External Contract via an upload, select Customer to External Contract from the Cross Reference Data Mapping menu.
- Select Upload.
- Download the available template.
- Enter your values on the template and save.
- Select Choose File and Upload.
Searching for Customer to External Contract
- From the Setup menu, select Mapping then Cross Reference Data Mapping from the dropdown.
- Select Customer to External Contract from the Maps
- Results will be displayed in the chart below.
Exporting Customer to External Contract
- From the Setup menu, select Mapping then Cross Reference Data Mapping from the dropdown.
- Select Customer to External Contract from the Maps
- Select Export to Exel.
Modifying Customer to External Contract
- To modify Customer to External Contract, select Cross Reference Data Mapping from the Select Mapping menu.
- Select Customer to External Contract from the Maps dropdown.
- Select Edit and make any required changes.
- Click Update to save.
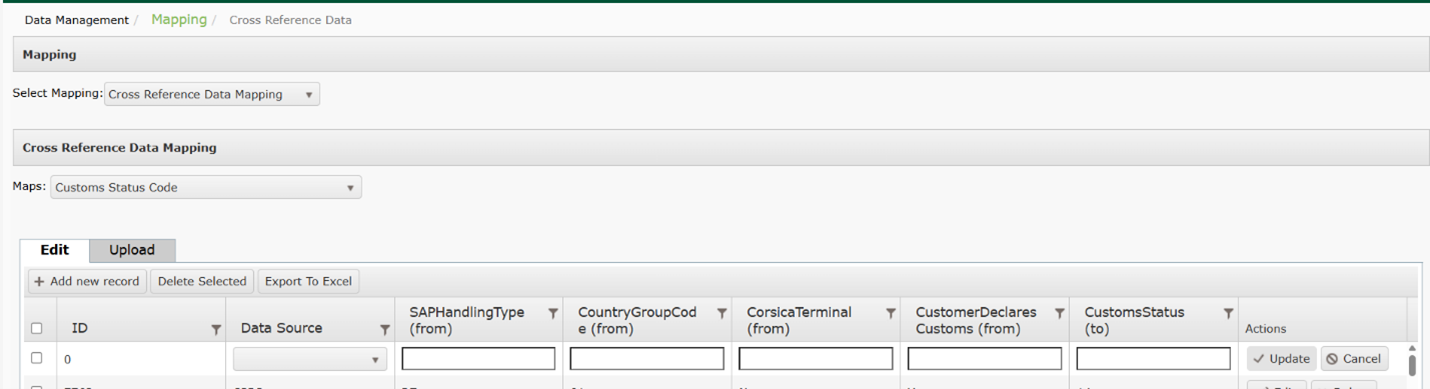
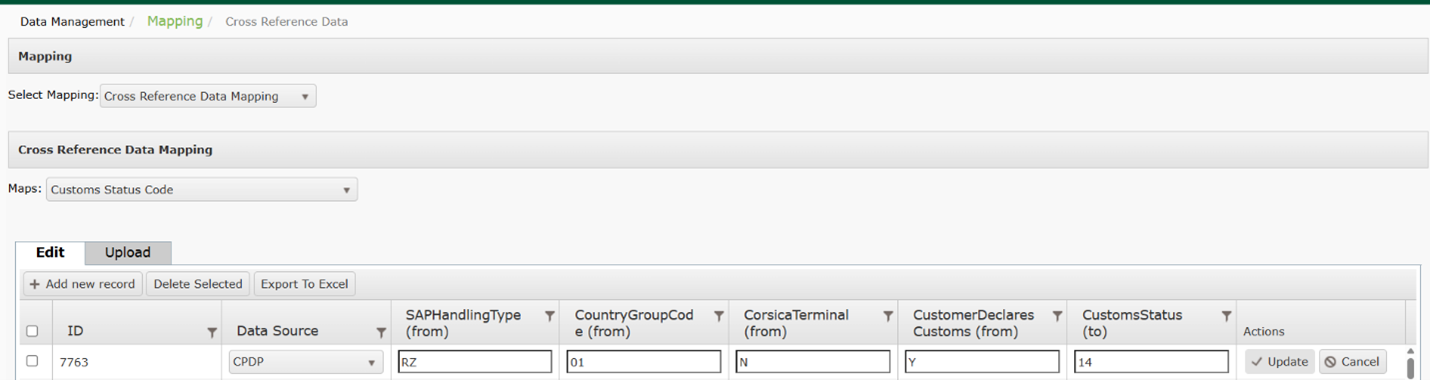
Customs Status Code
Setting up Customs Status Code
This mapping may be completed from the configuration page in TABS or via an upload.
- To setup mapping from the configuration page, select Cross Reference Data Mapping.from the dropdown menu.
- Select Customs Status Code from the Maps
- Select Add New Record. Enter the following fields:
- Data Source (required): Identifies the source system of the product codes to be sent to DTN TABS.
- SAPHandlingType (from)
- CountryGroupCode (from)
- CorsicaTerminal (from)
- CustomerDeclaresCustoms (from)
- CustomsStatus (to)
- Select Update to save the record.
- To configure Customs Status Code via an upload, select Customer to External Contract from the Cross Reference Data Mapping menu.
- Select Upload.
- Download the available template.
- Enter your values on the template and save.
- Select Choose File and Upload.
Searching for Customs Status Code
- From the Setup menu, select Mapping then Cross Reference Data Mapping from the dropdown.
- Select Customs Status Code from the Maps
- Results will be displayed in the chart below.

Exporting Customs Status Code
- From the Setup menu, select Mapping then Cross Reference Data Mapping from the dropdown.
- Select Customs Status Code from the Maps
- Select Export to Export.
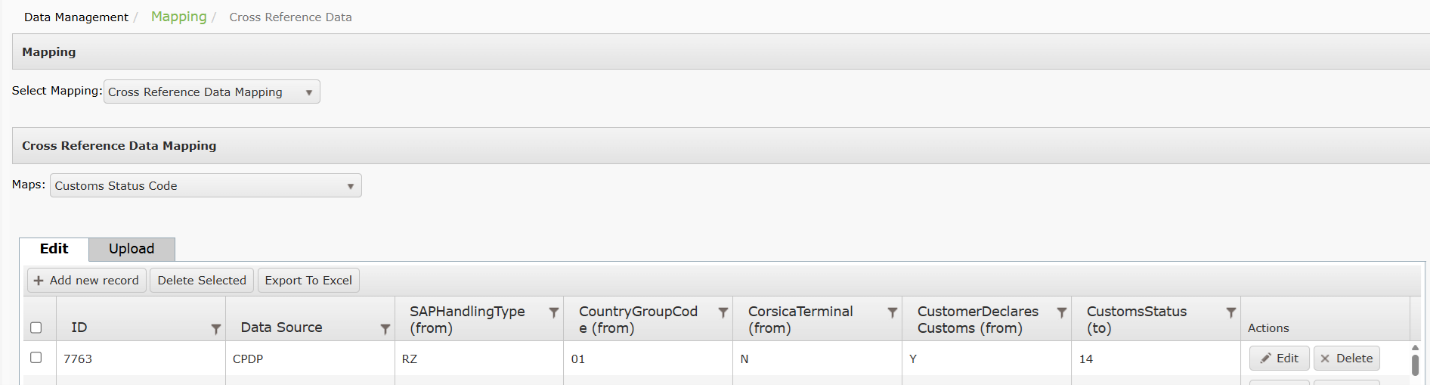
Modifying Customs Status Code
- To modify Customer to External Contract, select Cross Reference Data Mapping from the Select Mapping menu.
- Select Customs Status Code from the Maps dropdown.
- Select Edit and make any required changes.
- Click Update to save.
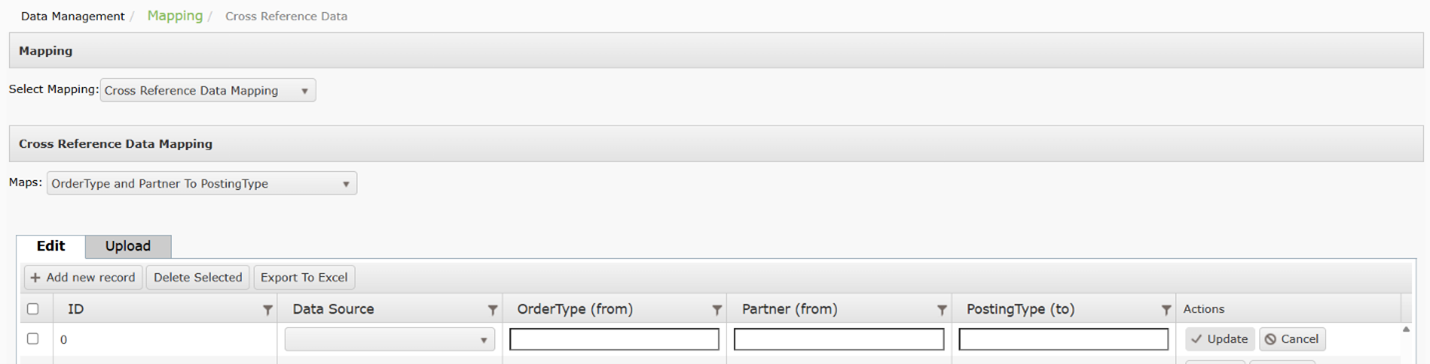
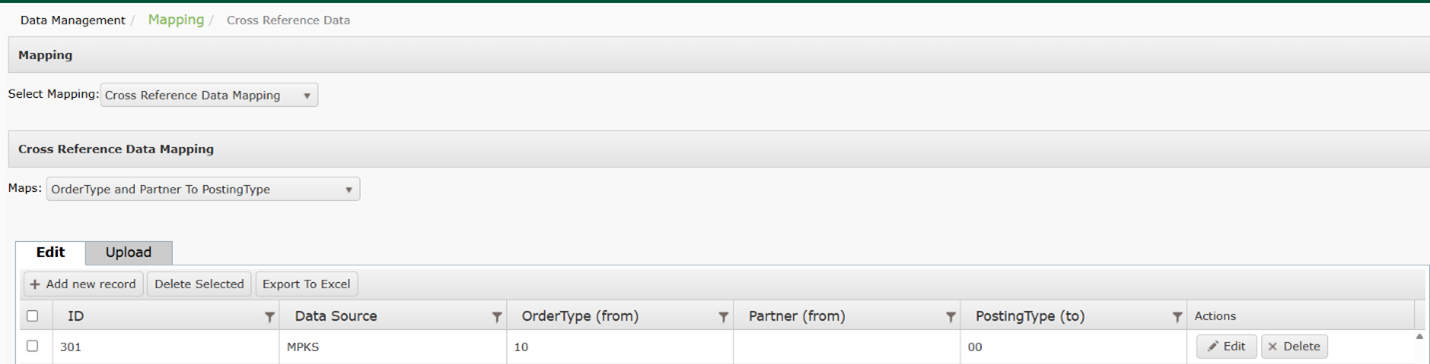
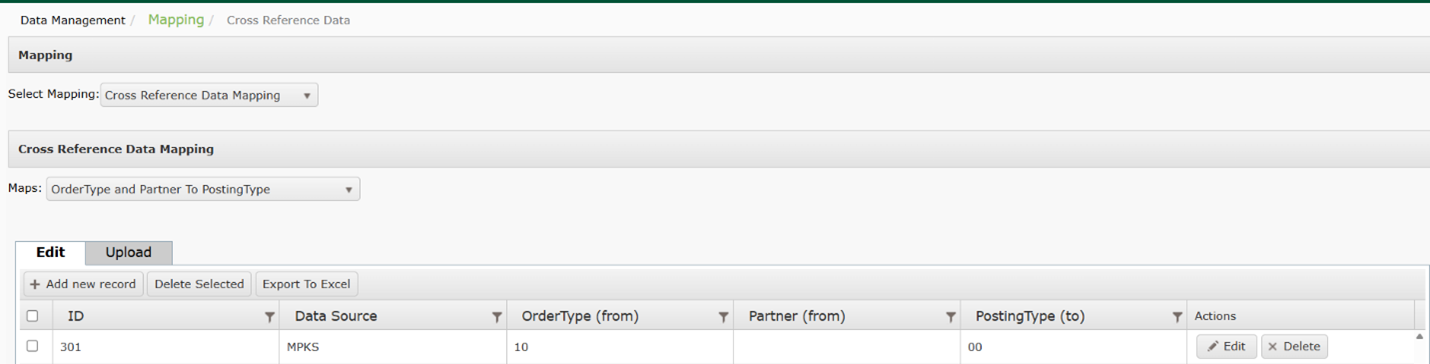
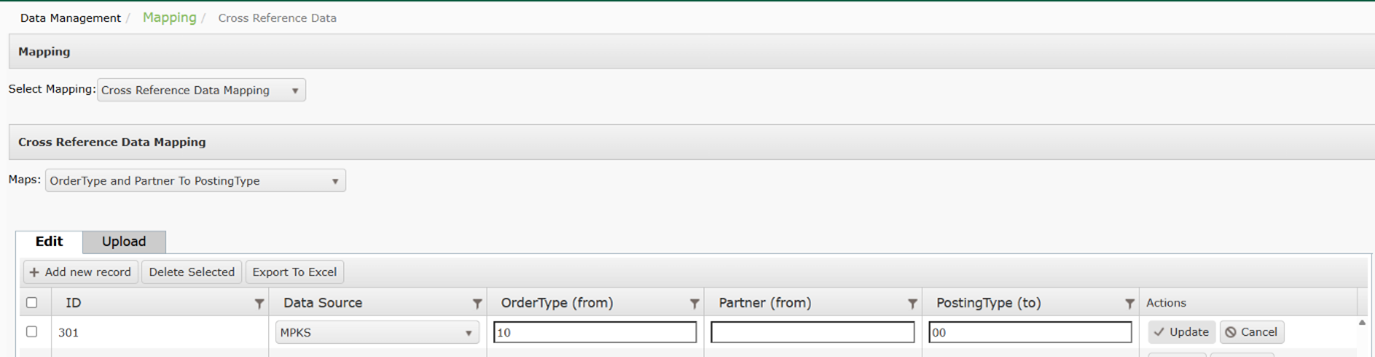
OrderType and Partner to PostingType
Setting up OrderType and Partner to PostingType
This mapping may be completed from the configuration page in TABS or via an upload.
- To setup mapping from the configuration page, select Cross Reference Data Mapping.from the dropdown menu.
- Select OrderType and Partner to PostingType from the Maps
- Select Add New Record. Enter the following fields:
- Data Source (required): Identifies the source system of the product codes to be sent to DTN TABS.
- OrderType (from)
- Partner (from)
- PostingType (to)
- Select Update to save the record.
- To configure OrderType and Partner to PostingType an upload, select OrderType and Partner to PostingType from the Cross Reference Data Mapping menu.
- Select Upload.
- Download the available template.
- Enter your values on the template and save.
- Select Choose File and Upload.
Searching for OrderType and Partner to PostingType
- From the Setup menu, select Mapping then Cross Reference Data Mapping from the dropdown.
- Select OrderType and Partner to PostingType from the Maps
- Results will be displayed in the chart below.
Exporting OrderType and Partner to PostingType
- From the Setup menu, select Mapping then Cross Reference Data Mapping from the dropdown..
- Select OrderType and Partner to PostingType from the Maps
- Select Export to Excel.
Modifying OrderType and Partner to PostingType
- To modify OrderType and Partner to PostingType, select Cross Reference Data Mapping from the Select Mapping menu.
- Select COrderType and Partner to PostingType from the Maps dropdown.
- Select Edit and make any required changes.
- Click Update to save.
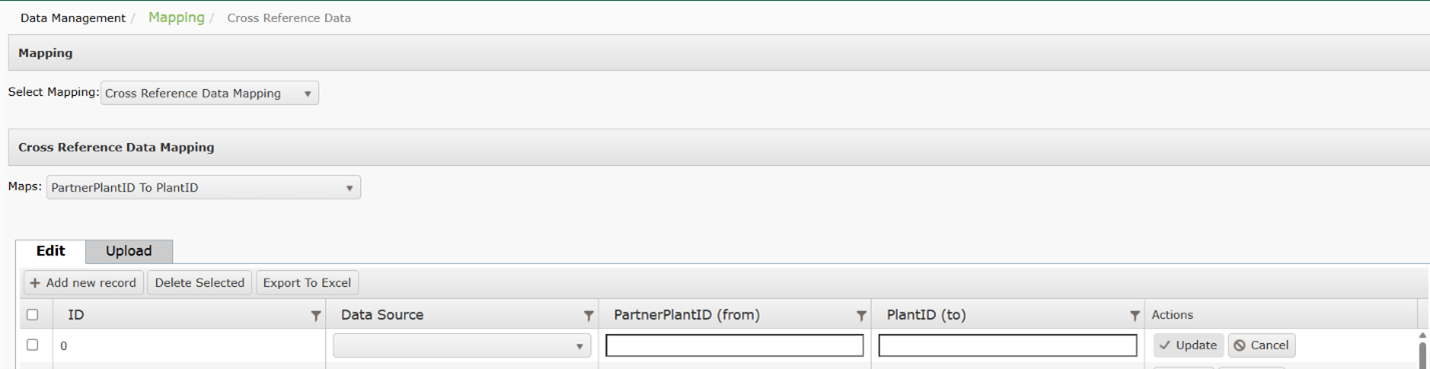
PartnerPlantID to PlantID
Setting up PartnerPlantID to PlantID
This mapping may be completed from the configuration page in TABS or via an upload.
- To setup mapping from the configuration page, select Cross Reference Data Mapping.from the dropdown menu.
- Select PartnerPlantID to PlantID from the Maps
- Select Add New Record. Enter the following fields:
- Data Source (required): Identifies the source system of the product codes to be sent to DTN TABS.
- PartnerPlantID (from)
- PartnerPlantID (to)
- Select Update to save the record.
- To configure PartnerPlantID to PlantID an upload, select PartnerPlantID to PlantID from the Cross Reference Data Mapping menu.
- Select Upload.
- Download the available template.
- Enter your values on the template and save.
- Select Choose File and Upload.
Searching for PartnerPlantID to PlantID
- From the Setup menu, select Mapping then Cross Reference Data Mapping from the dropdown.
- Select PartnerPlantID to PlantID from the Maps
- Results will be displayed in the chart below.

Exporting PartnerPlantID to PlantID
- From the Setup menu, select Mapping then Cross Reference Data Mapping from the dropdown.
- Select PartnerPlantID to PlantID from the Maps
- Select Export to Excel.
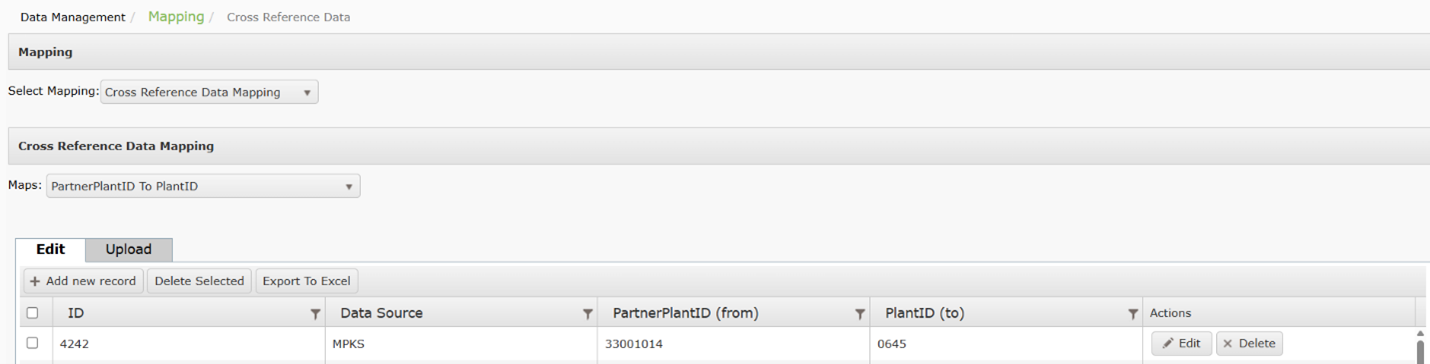
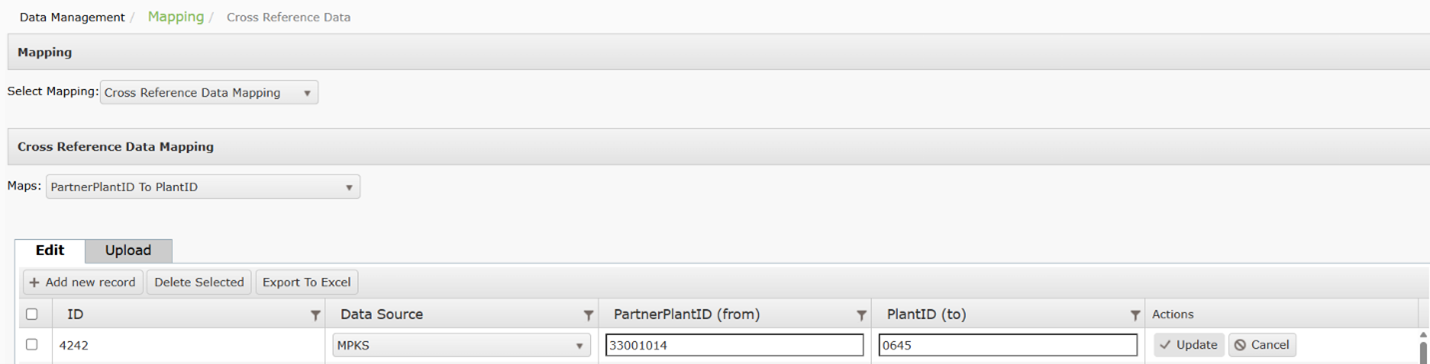
Modifying PartnerPlantID to PlantID
- To modify PartnerPlantID to PlantID, select Cross Reference Data Mapping from the Select Mapping menu.
- Select PartnerPlantID to PlantID from the Maps dropdown.
- Select Edit and make any required changes.
- Click Update to save.
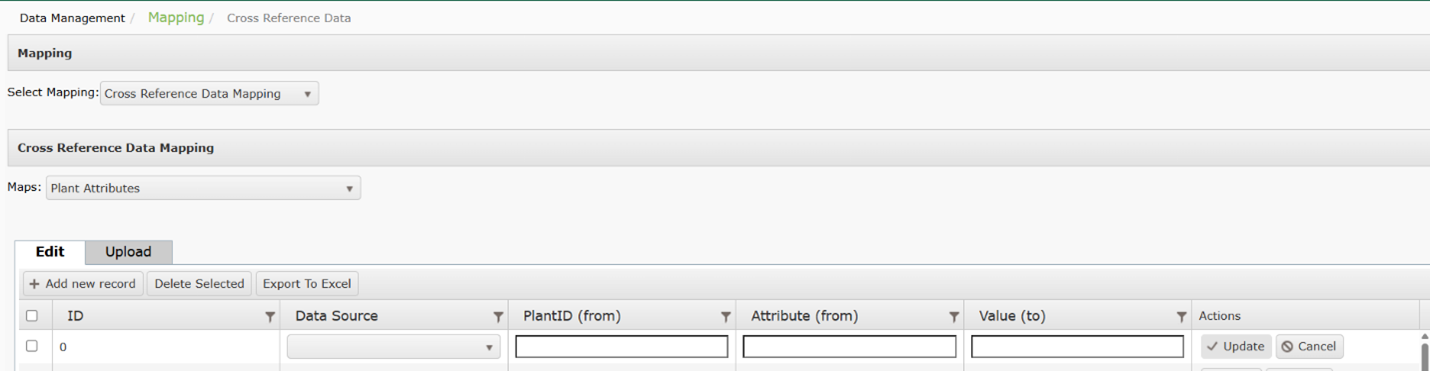
Plant Attributes
Setting up Plant Attributes
Plant Attributes are used for outbound CPDP in order to perform specific login for terminals that are defined as a refinery.
This mapping may be completed from the configuration page in TABS or via an upload.
- To setup mapping from the configuration page, select Cross Reference Data Mapping.from the dropdown menu.
- Select Plant Attributes from the Maps
- Select Add New Record. Enter the following fields:
- Data Source (required): Identifies the source system of the product codes to be sent to DTN TABS.
- PlantID (from)
- Attribute (from)
- Value (to)
- Select Update to save the record.
- To configure Plant Attributes via an upload, select Plant Attributes from the Cross Reference Data Mapping menu.
- Select Upload.
- Download the available template.
- Enter your values on the template and save.
- Select Choose File and Upload.
Searching for Plant Attributes
- From the Setup menu, select Mapping then Cross Reference Data Mapping from the dropdown.
- Select Plant Attributes from the Maps
- Results will be displayed in the chart below.

Exporting Plant Attributes
- From the Setup menu, select Mapping then Cross Reference Data Mapping from the dropdown.
- Select Plant Attributes from the Maps
- Select Export to Excel.
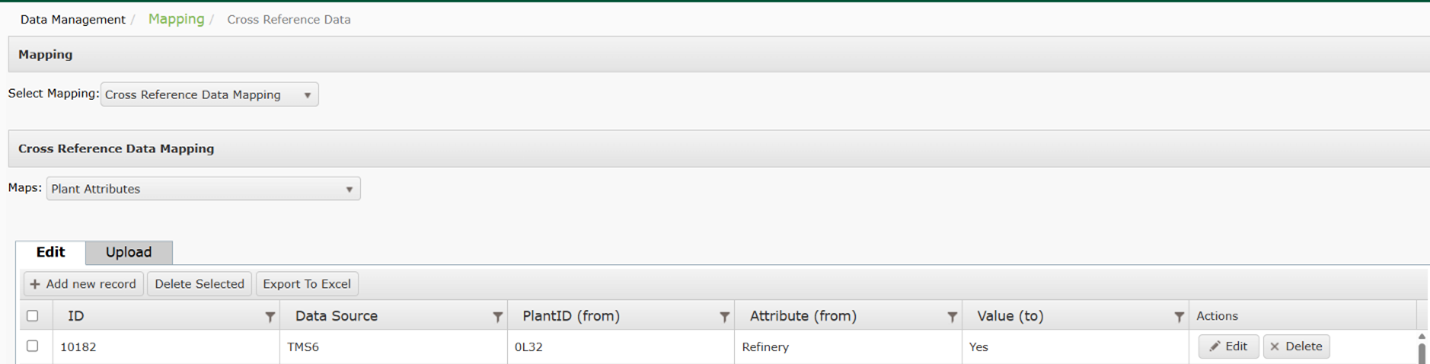
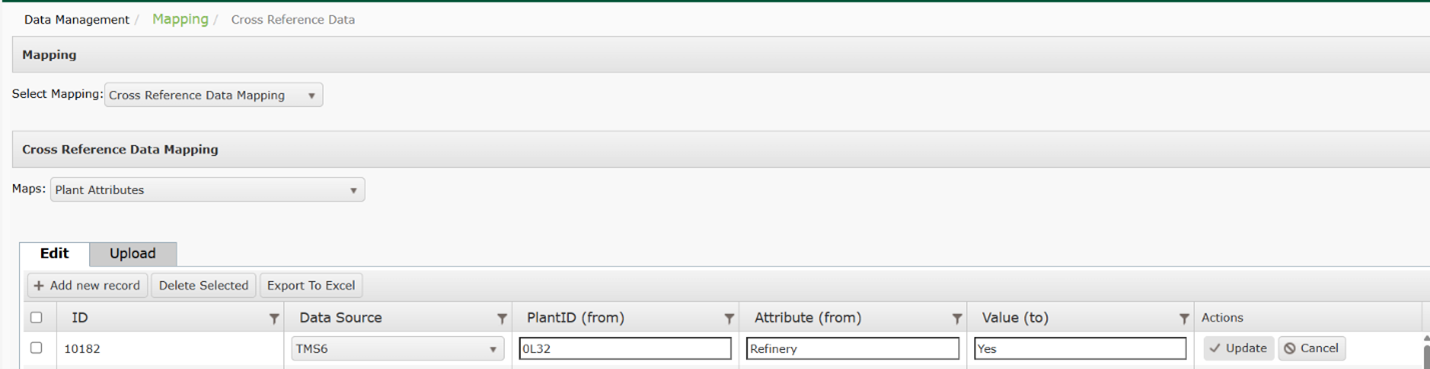
Modifying Plant Attributes
- To modify Plant Attributes, select Cross Reference Data Mapping from the Select Mapping menu.
- Select Plant Attributes from the Maps dropdown.
- Select Edit and make any required changes.
- Click Update to save.
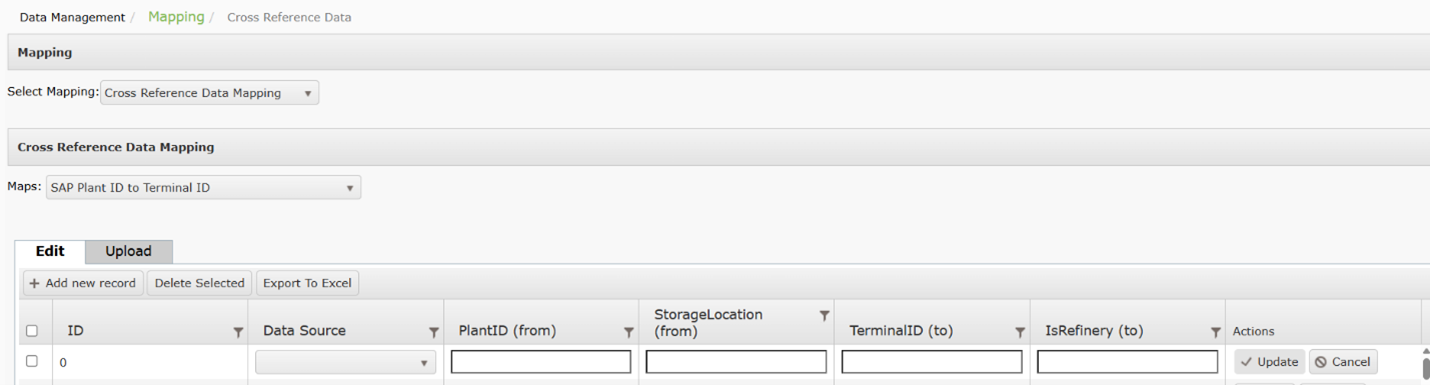
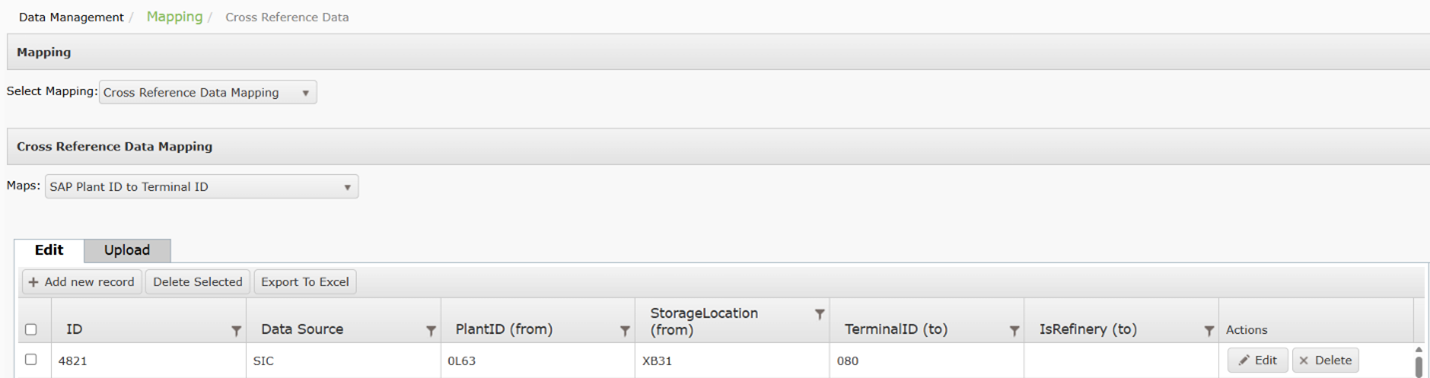
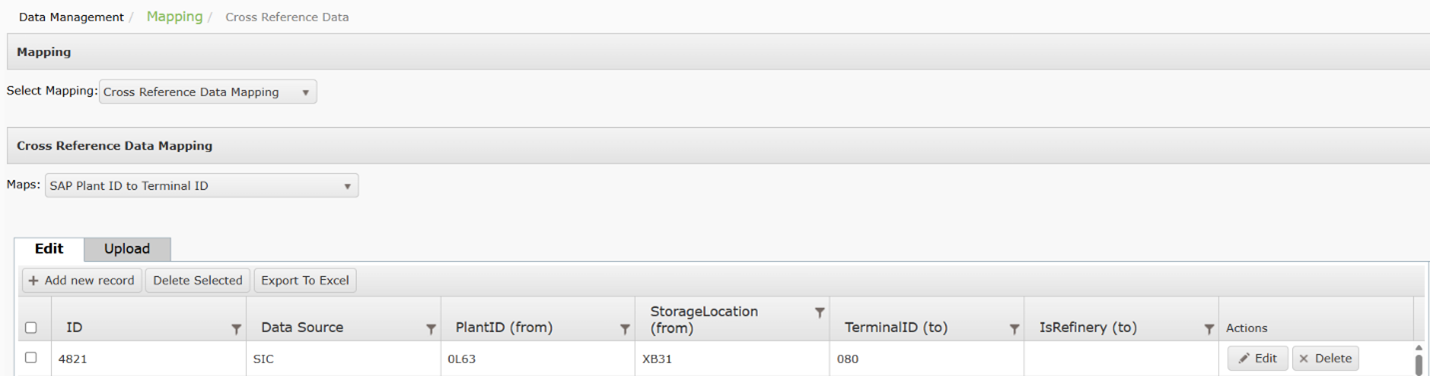
SAP Plant ID to Terminal ID
Setting up SAP Plant ID to Terminal ID
This mapping is used to map external system’s plant code to an ERP plant code in TABS.
Plant Attributes are used for outbound CPDP in order to perform specific login for terminals that are defined as a refinery.
This mapping may be completed from the configuration page in TABS or via an upload.
- To setup mapping from the configuration page, select Cross Reference Data Mapping.from the dropdown menu.
- Select SAP Plant ID to Terminal ID from the Maps
- Select Add New Record. Enter the following fields:
- Data Source (required): Identifies the source system of the product codes to be sent to DTN TABS.
- PlantID (from)
- StorageLocation (from)
- TerminalID (to)
- IsRefinery (to)
- Select Update to save the record.
- To configure SAP Plant ID to Terminal ID via an upload, select SAP Plant ID to Terminal ID from the Cross Reference Data Mapping menu.
- Select Upload.
- Download the available template.
- Enter your values on the template and save.
- Select Choose File and Upload.
Searching for SAP Plant ID to Terminal ID
- From the Setup menu, select Mapping then Cross Reference Data Mapping from the dropdown.
- Select SAP Plant ID to Terminal ID from the Maps
- Results will be displayed in the chart below.
Exporting SAP Plant ID to Terminal ID
- From the Setup menu, select Mapping then Cross Reference Data Mapping from the dropdown.
- Select SAP Plant ID to Terminal ID from the Maps
- Select Export to Excel.
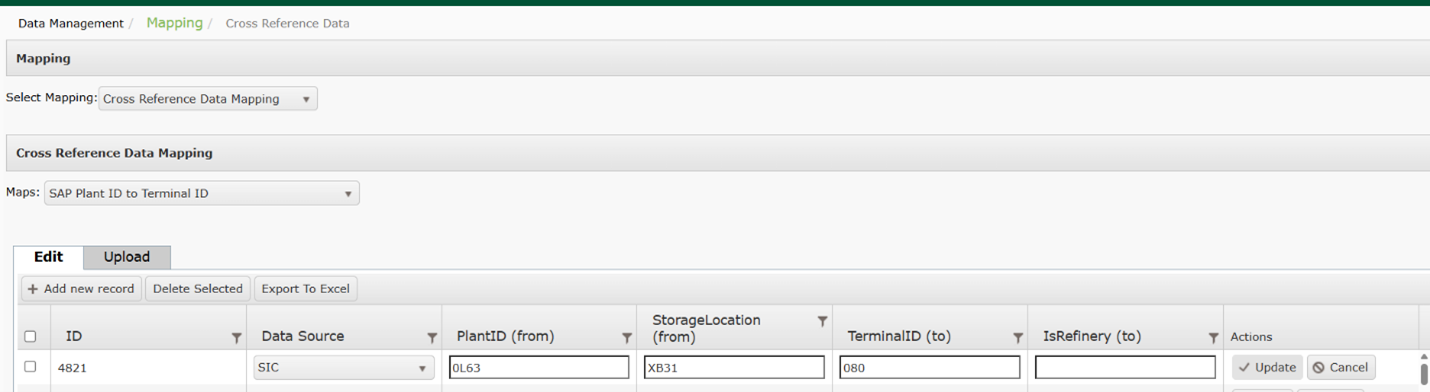
Modifying SAP Plant ID to Terminal ID
- To modify SAP Plant ID to Terminal ID, select Cross Reference Data Mapping from the Select Mapping menu.
- Select SAP Plant ID to Terminal ID from the Maps dropdown.
- Select Edit and make any required changes.
- Click Update to save.
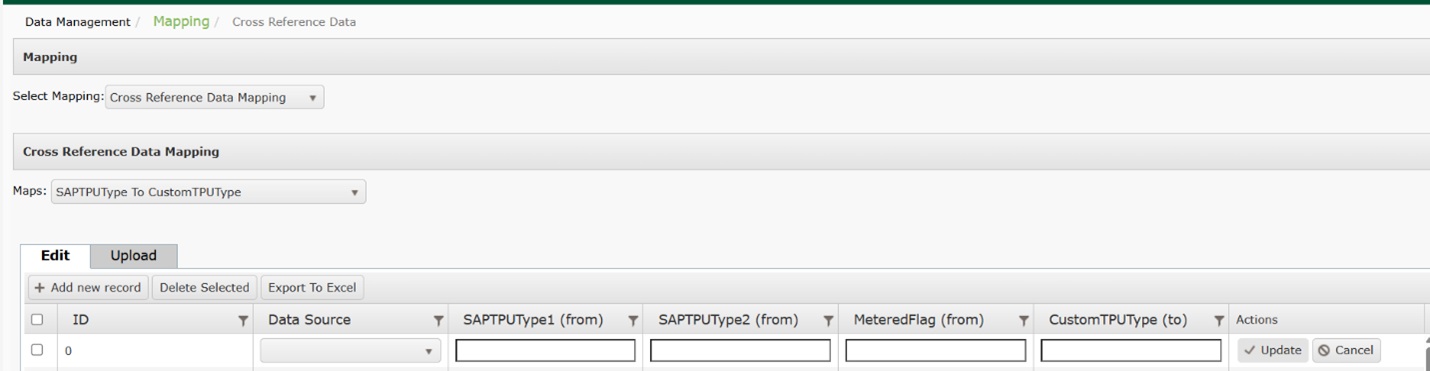
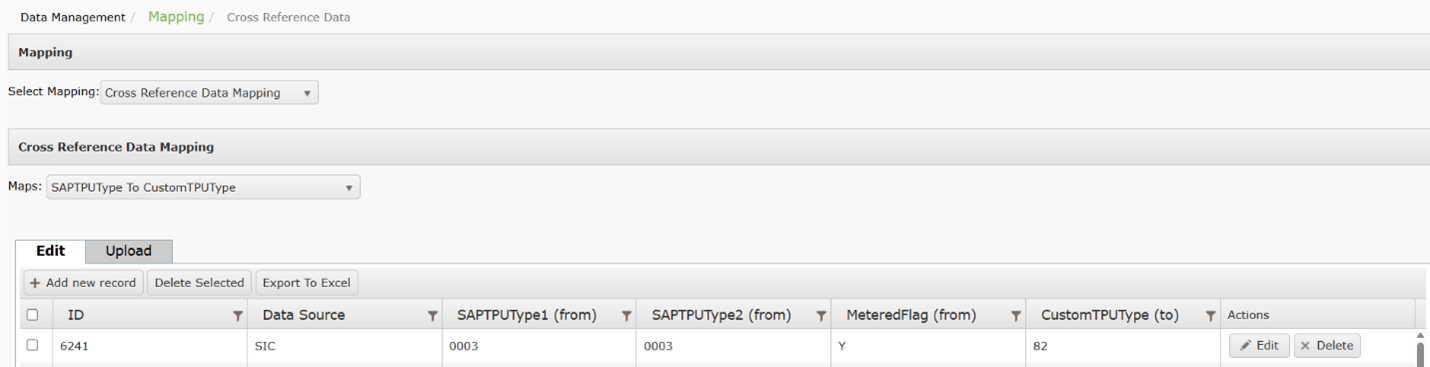
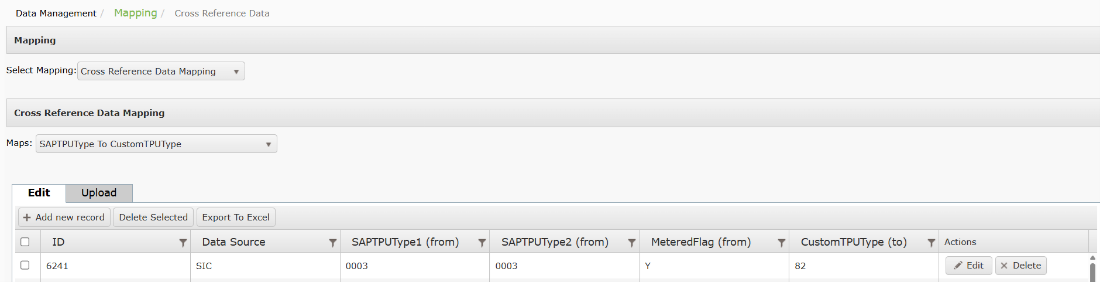
SAPTPUType To CustomTPUType
Setting up SAPTPUType To CustomTPUType
This maps the SIC TPU type codes to standard SAP types.
This mapping may be completed from the configuration page in TABS or via an upload.
- To setup mapping from the configuration page, select Cross Reference Data Mapping.from the dropdown menu.
- Select SAPTPUType To CustomTPUType from the Maps
- Select Add New Record. Enter the following fields:
- Data Source (required): Identifies the source system of the product codes to be sent to DTN TABS.
- SAPTPUType1 (from)
- SAPTPUType2 (from)
- MeteredFlag (from)
- CustomTPUType (to)
- Select Update to save the record.
- To configure SAPTPUType To CustomTPUType via an upload, select SAPTPUType To CustomTPUType from the Cross Reference Data Mapping menu.
- Select Upload.
- Download the available template.
- Enter your values on the template and save.
- Select Choose File and Upload.
Searching for SAPTPUType To CustomTPUType
- From the Setup menu, select Mapping then Cross Reference Data Mapping from the dropdown.
- Select SAPTPUType To CustomTPUType from the Maps
- Results will be displayed in the chart below.
Exporting SAPTPUType To CustomTPUType
- From the Setup menu, select Mapping then Cross Reference Data Mapping from the dropdown.
- Select SAPTPUType To CustomTPUType from the Maps
- Select Export to Excel.
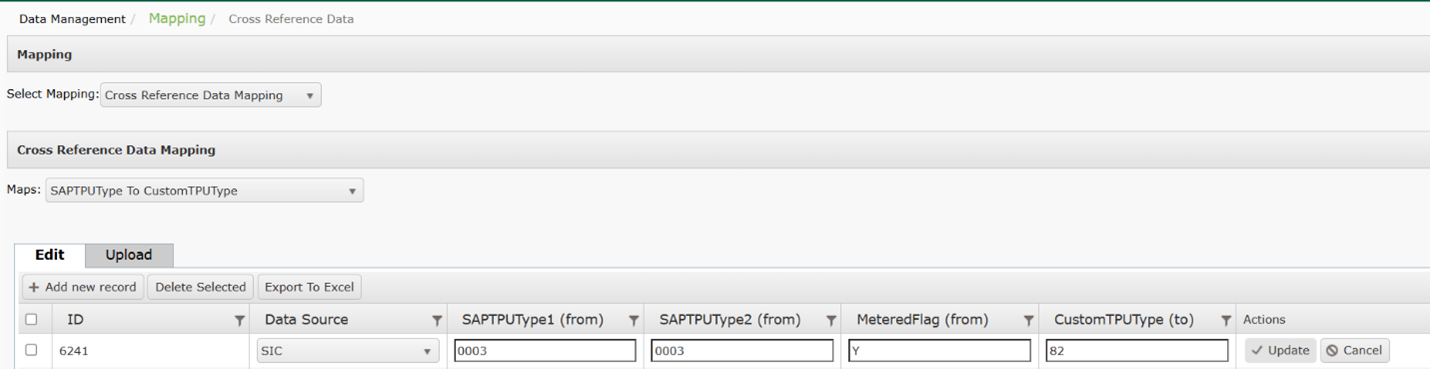
Modifying SAPTPUType To CustomTPUType
- To modify SAPTPUType To CustomTPUType, select Cross Reference Data Mapping from the Select Mapping menu.
- Select SAPTPUType To CustomTPUType from the Maps dropdown.
- Select Edit and make any required changes.
- Click Update to save.
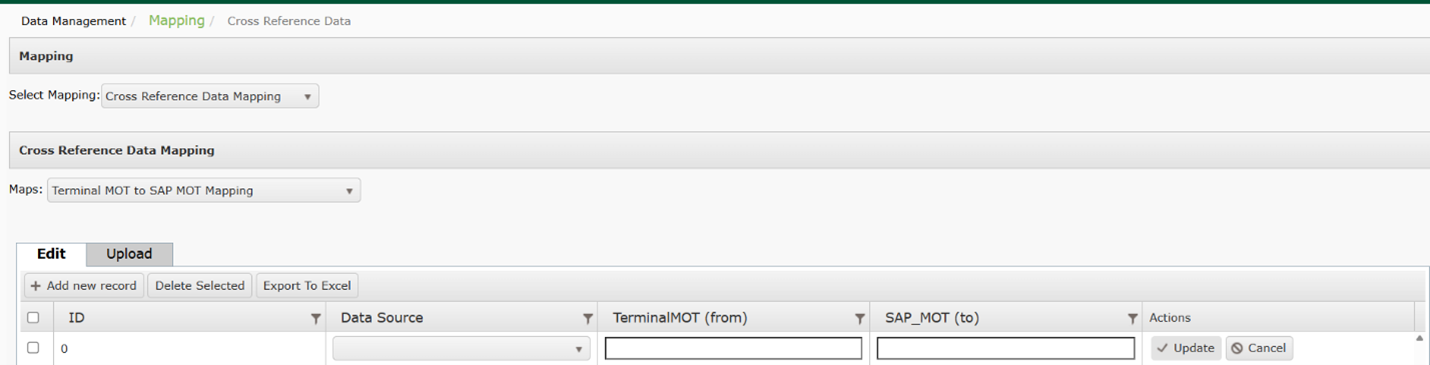
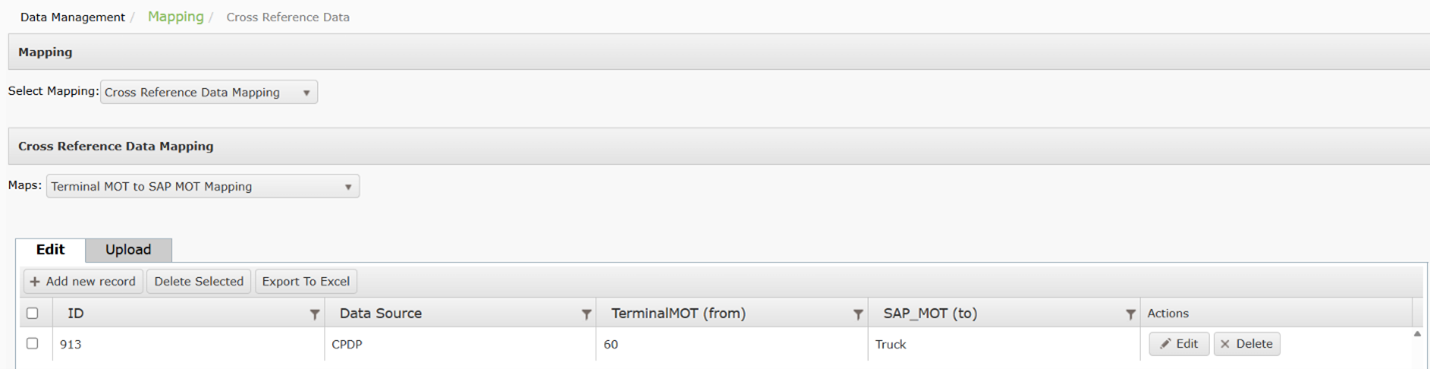
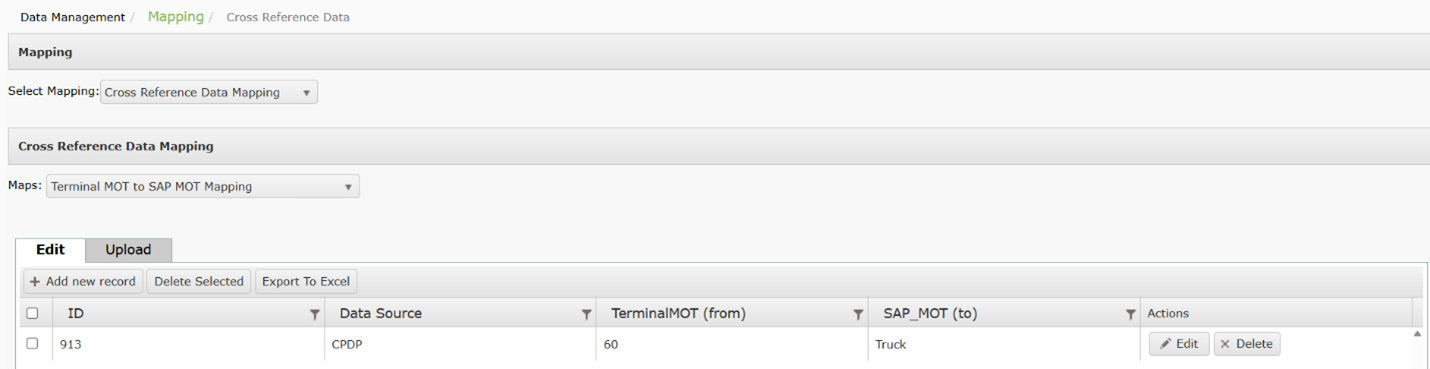
Terminal MOT to SAP MOT Mapping
Setting up Terminal MOT to SAP MOT Mapping
This mapping is used to convert CPDP MOT to an ERP MOT in TABS.
This mapping may be completed from the configuration page in TABS or via an upload.
- To setup mapping from the configuration page, select Cross Reference Data Mapping.from the dropdown menu.
- Select Terminal MOT to SAP MOT Mapping from the Maps
- Select Add New Record. Enter the following fields:
- Data Source (required): Identifies the source system of the product codes to be sent to DTN TABS.
- TerminalMOT (from_
- SAP_MOT (to)
- Select Update to save the record.
- To configure Terminal MOT to SAP MOT Mapping via an upload, select Terminal MOT to SAP MOT Mapping from the Cross Reference Data Mapping menu.
- Select Upload.
- Download the available template.
- Enter your values on the template and save.
- Select Choose File and Upload.
Searching for Terminal MOT to SAP MOT Mapping
- From the Setup menu, select Mapping then Cross Reference Data Mapping from the dropdown.
- Select Terminal MOT to SAP MOT Mapping from the Maps
- Results will be displayed in the chart below.
Exporting Terminal MOT to SAP MOT Mapping
- From the Setup menu, select Terminal MOT to SAP MOT Mapping from the dropdown.
- Select Terminal MOT to SAP MOT Mapping from the Maps
- Select Export to Excel.
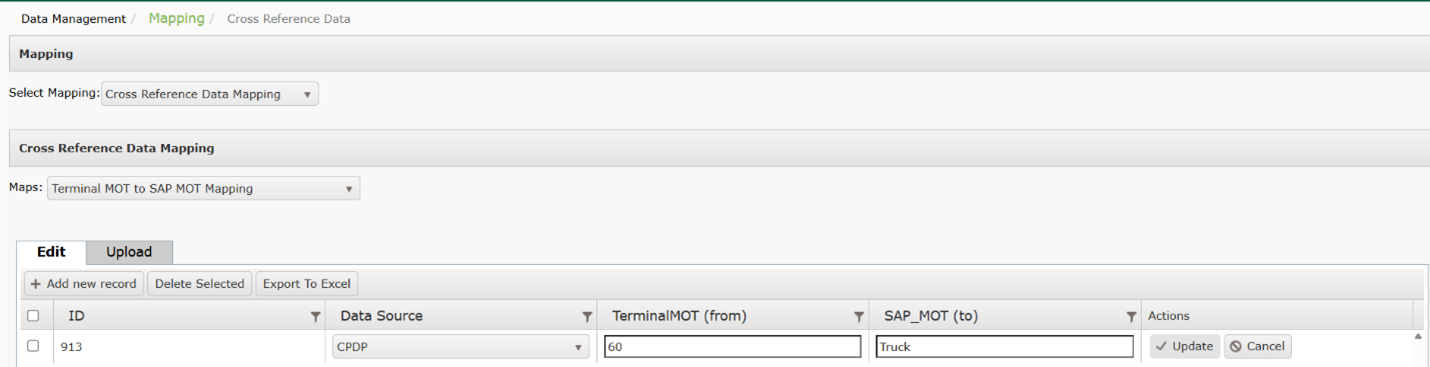
Modifying Terminal MOT to SAP MOT Mapping
- To modify Terminal MOT to SAP MOT Mapping, select Cross Reference Data Mapping from the Select Mapping menu.
- Select Terminal MOT to SAP MOT Mapping from the Maps dropdown.
- Select Edit and make any required changes.
- Click Update to save.
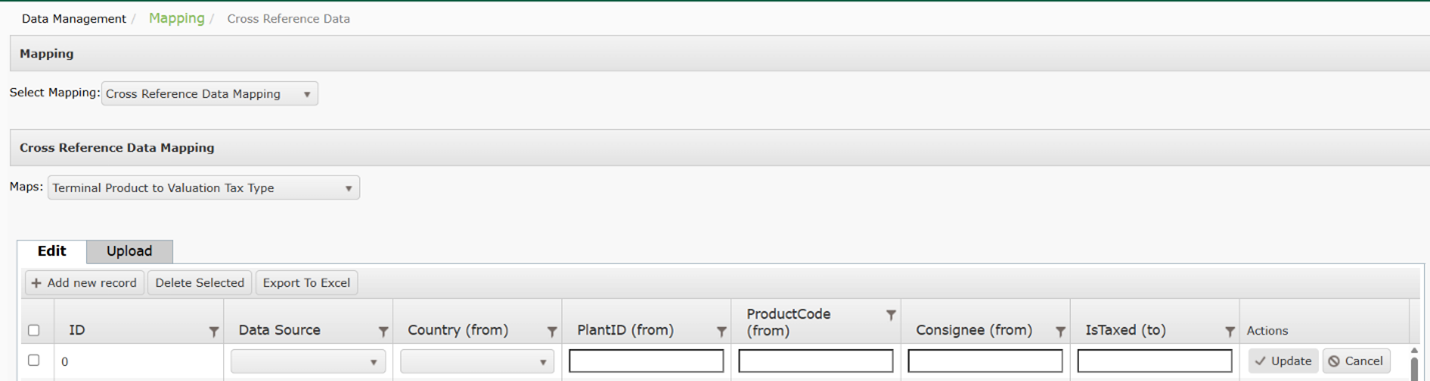
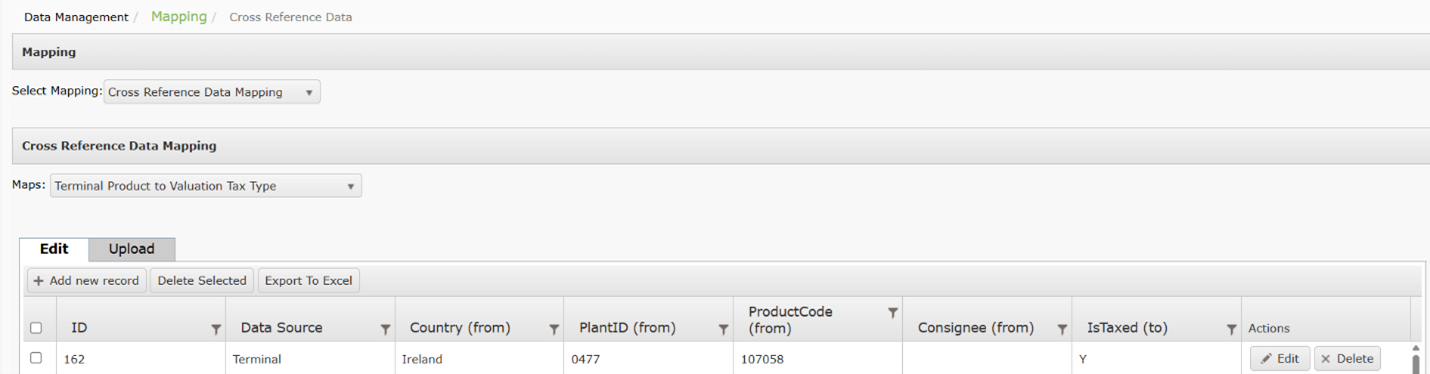
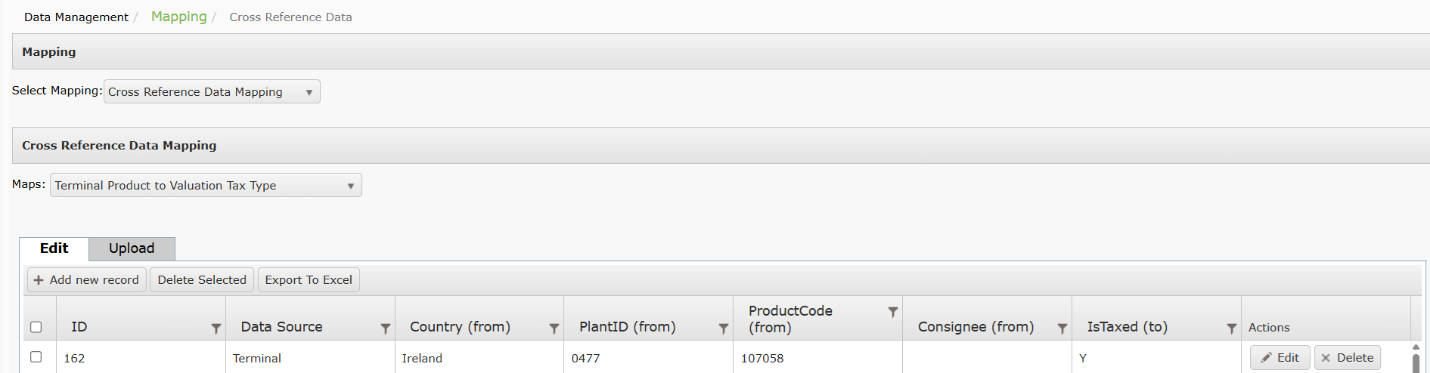
Terminal Product to Valuation Tax Type
Setting up Terminal Product to Valuation Tax Type
This is used for all processes for BOL enhancement.
This mapping may be completed from the configuration page in TABS or via an upload.
- To setup mapping from the configuration page, select Cross Reference Data Mapping.from the dropdown menu.
- Select Terminal Product to Valuation Tax Type from the Maps
- Select Add New Record. Enter the following fields:
- Data Source (required): Identifies the source system of the product codes to be sent to DTN TABS.
- Country (from)
- PlantID (from)
- ProductCode (from)
- Consignee (from)
- IsTaxed (to)
- Select Update to save the record.
- To configure Terminal Product to Valuation Tax Type via an upload, select Terminal Product to Valuation Tax Type from the Cross Reference Data Mapping menu.
- Select Upload.
- Download the available template.
- Enter your values on the template and save.
- Select Choose File and Upload.
Searching for Terminal Product to Valuation Tax Type
- From the Setup menu, select Mapping then Cross Reference Data Mapping from the dropdown.
- Select Terminal Product to Valuation Tax Type from the Maps
- Results will be displayed in the chart below.
Exporting Terminal Product to Valuation Tax Type
- From the Setup menu, select Cross Reference Data Mapping from the dropdown.
- Select Terminal Product to Valuation Tax Type from the Maps
- Select Export to Excel.
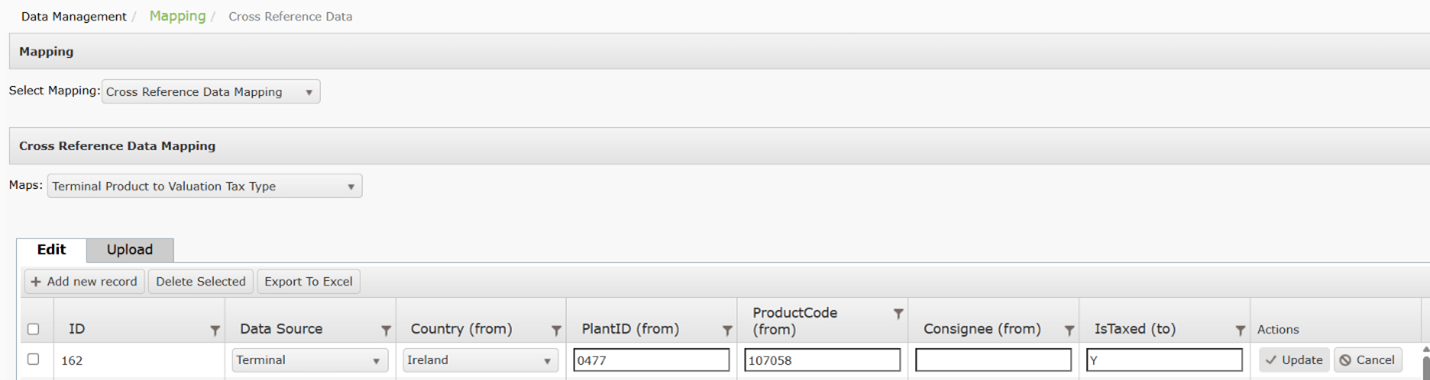
Modifying Terminal Product to Valuation Tax Type
- To modify Terminal Product to Valuation Tax Type, select Cross Reference Data Mapping from the Select Mapping menu.
- Select Terminal Product to Valuation Tax Type from the Maps dropdown.
- Select Edit and make any required changes.
- Click Update to save.
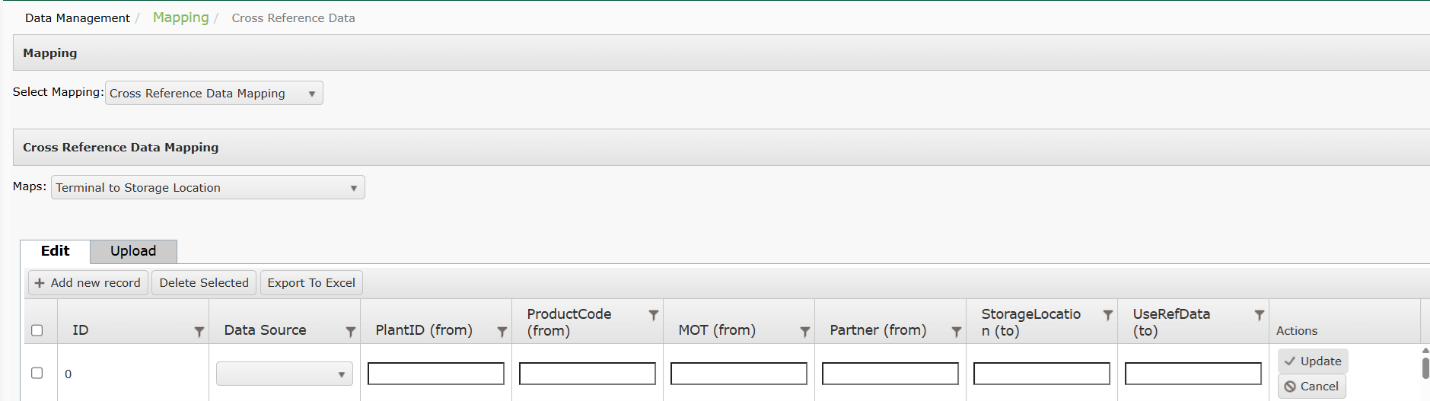
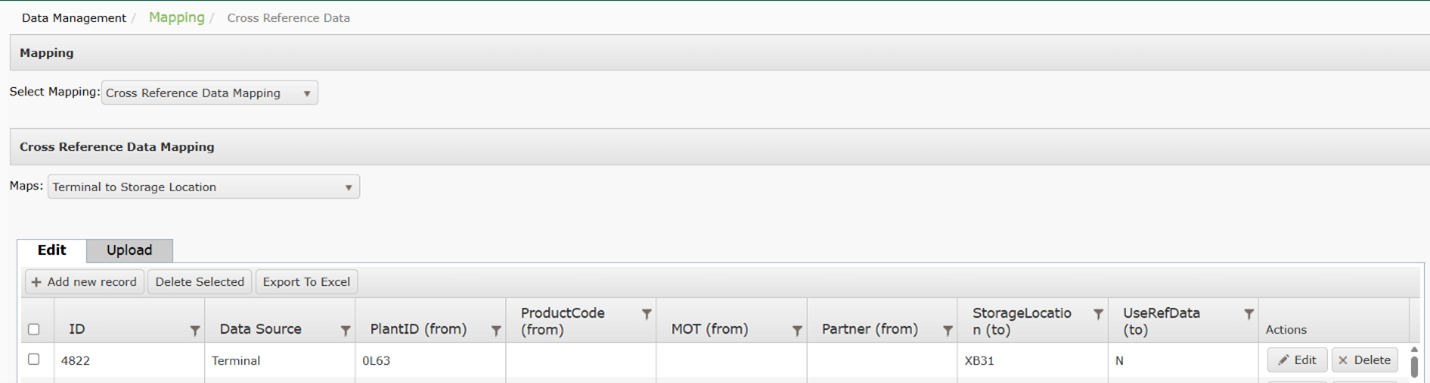
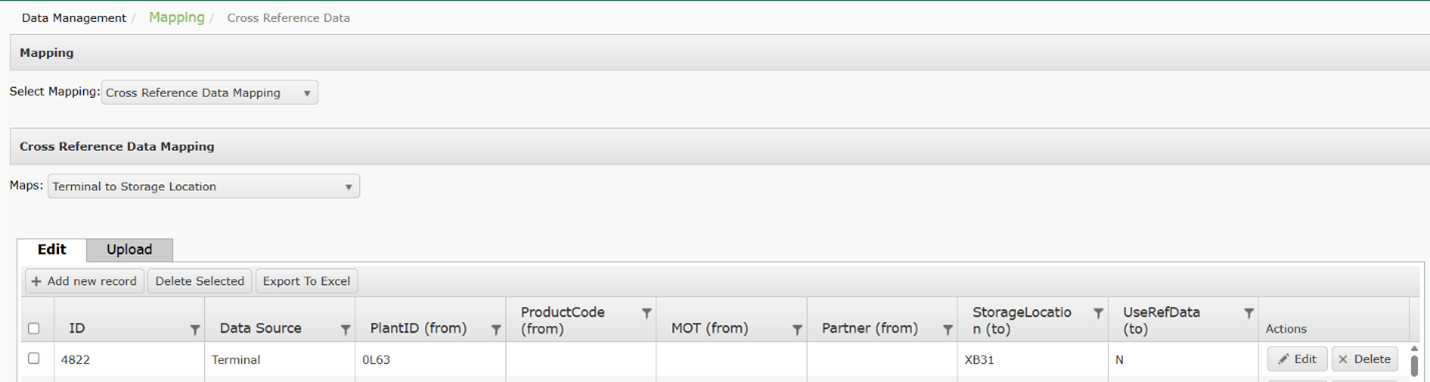
Terminal to Storage Location
Setting up Terminal to Storage Location
Terminal to Storage location maps a physical location to a virtual location ID for SAP.
This mapping may be completed from the configuration page in TABS or via an upload.
- From the Setup menu, select Mapping then Cross Reference Data Mapping from the dropdown.
- Select Terminal to Storage Location from the Maps Any existing Terminal to Storage Location Mappings will display.
- To add a Terminal to Storage Location, click Add New Record.
- Selecting the following fields:
- Data source (required): Identifies the source system of the product codes to be sent to DTN TABS.
- Terminal ID (required): Identifies the Terminal ID from which data is coming from.
- Contract ID (required): Identifies the Contract ID that is to be mapped.
- PlantID (required): Identifies the PlantID that is used for mapping.
- MOT (from)
- Partner (from)
- StorageLocation (to)
- UseRefData (to)
- Update to save.
- To configure Terminal to Storage Location via an upload, select Terminal to Storage Location from the Cross Reference Data Mapping menu.
- Select Upload.
- Download the available template.
- Enter your values on the template and save.
- Select Choose File and Upload.
Searching for Terminal to Storage Location
- From the Setup menu, select Mapping then Cross Reference Data Mapping from the dropdown.
- Select Terminal to Storage Location from the Maps
- Results will be displayed in the chart below.
Exporting Terminal to Storage Location
- From the Setup menu, select Cross Reference Data Mapping from the dropdown.
- Select Terminal to Storage Location from the Maps
- Select Export to Excel.
Modifying Terminal to Storage Location
- To modify Terminal to Storage Location, select Cross Reference Data Mapping from the Select Mapping menu.
- Select Terminal to Storage Location from the Maps dropdown.
- Select Edit and make any required changes.
- Click Update to save.

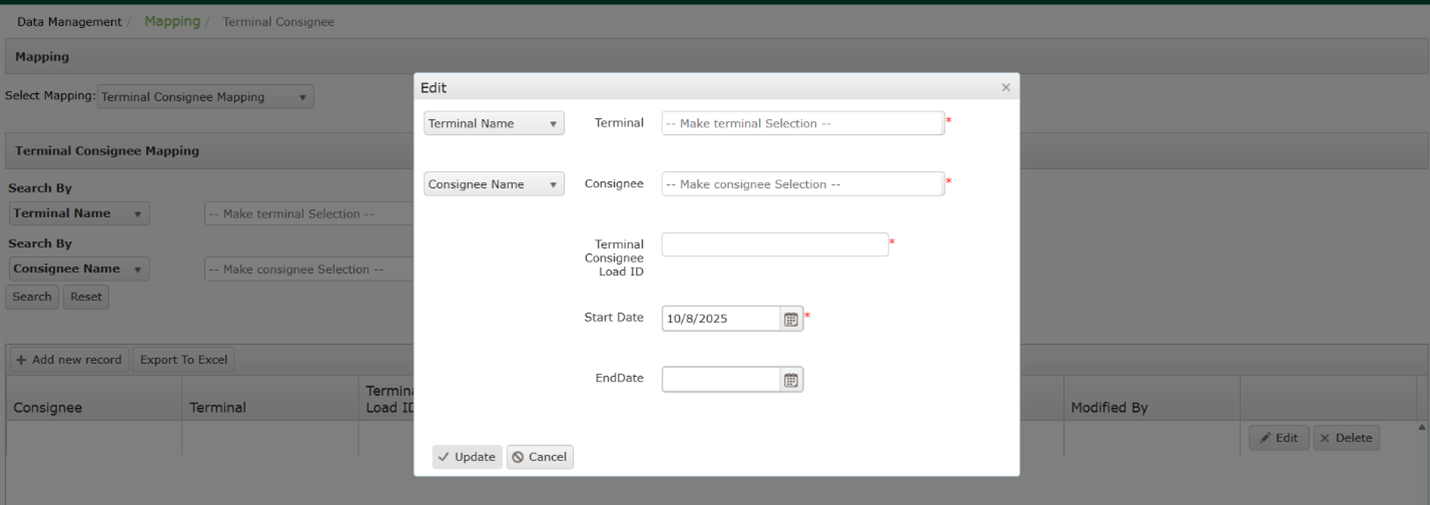
Terminal Consignee Mapping
Setting up Terminal Consignee Mapping
This mapping may be completed from the configuration page in TABS or via an upload.
- From the Setup menu, select Terminal Consignee Mapping from the dropdown.
- Click Add New Record.
- Selecting the following fields on the form displayed:
- Terminal
- Consignee
- Terminal Consignee Load ID
- Start Date
- End Date
- Update to save.
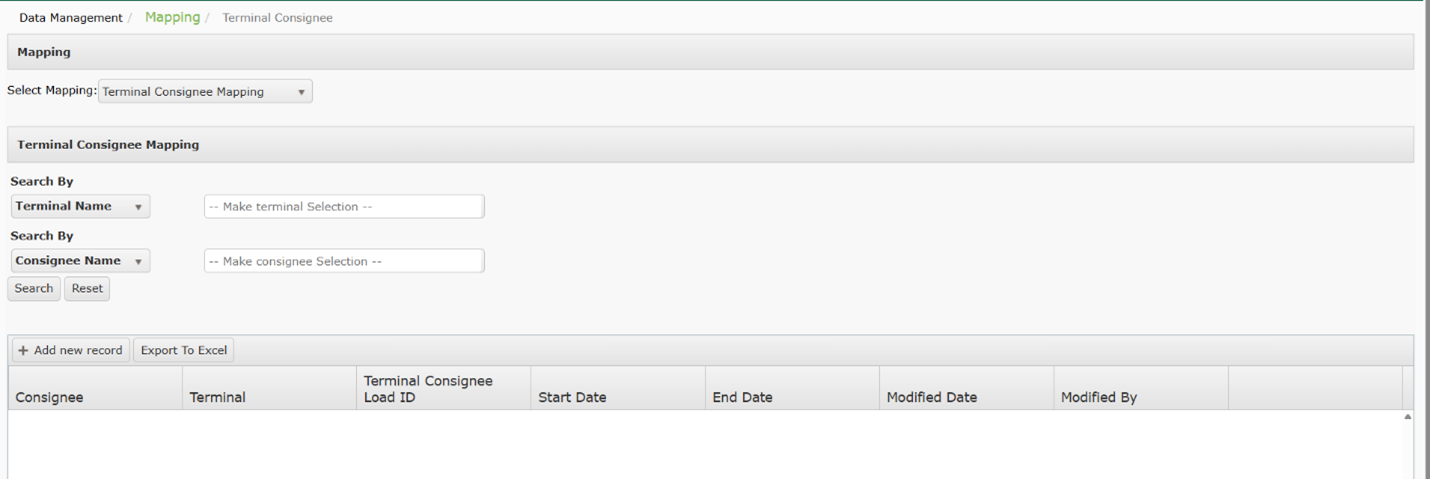
Searching for Terminal Consignee Mapping
- From the Setup menu, select Mapping then Terminal Consignee Mapping from the dropdown.
- Select a terminal and/or consignee.
- Click Search.
- Results will be displayed in the chart below.

Exporting Terminal Consignee Mapping
- From the Setup menu, select Mapping then Terminal Consignee Mapping from the dropdown.
- Select Export to Excel.
Modifying Terminal Consignee Mapping
- To modify Terminal Consignee Mapping, select Mapping then Terminal Consignee Mapping from the dropdown.
- Select Edit and make any required changes.
- Click Update to save.
